How to use NDI Access Manager for security
Written by Paul Richards on November 2, 2021
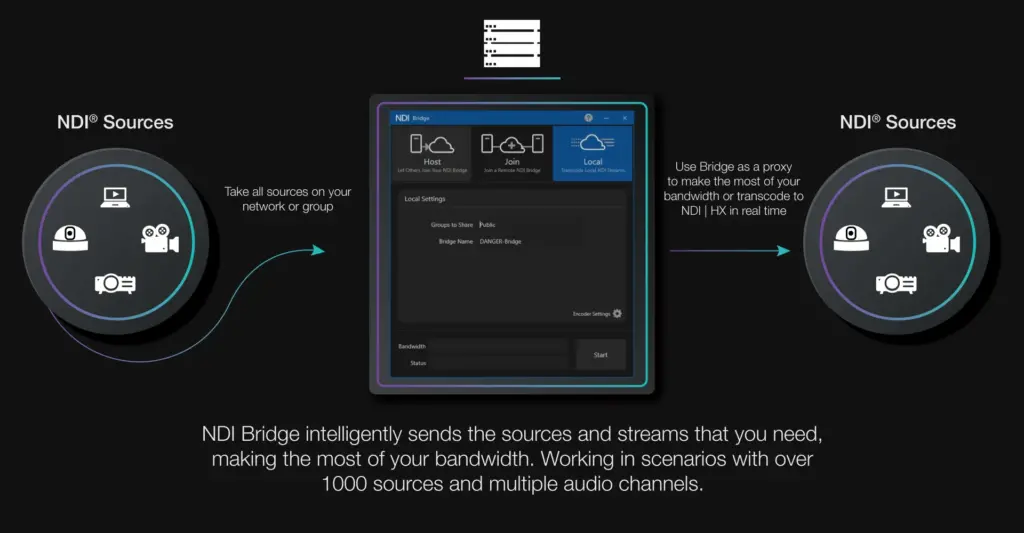
NDI® Access Manager is a free application included with NDI® Tools that allows you to manage NDI® sources on your network. NDI® Access Manager can be used to organize and manage groups of video sources for ease of use and security. NDI® Access Manager increases the security of your IP video sources by restricting access to specific computers on your network. Organizing the NDI® sources on your network into groups becomes important when you plan to send video sources over the public internet using NDI® Bridge which allows you to select entire groups of NDI® sources to work with. When NDI® sources are grouped together, they appear in NDI®-compatible software nested into an organized group. This may be ideal if you have multiple studios or spaces with NDI® sources on your network.
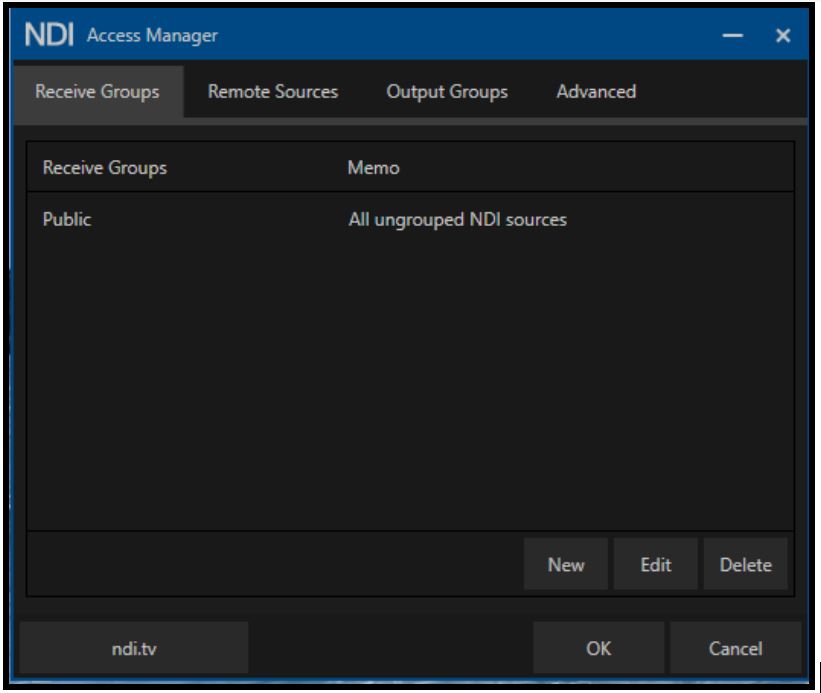
NDI access manager used for security
Receive Groups:
By default all NDI® sources are set to a “Public” group. Receive Groups allows you to “hide” NDI® resources on the network that are only discoverable on your network by a computer with access to the group credentials via Access Manager. To use the NDI® Receive Groups, you must first define a Group name on the NDI® source. NDI® Access Manager is then used to define who has access to sources in each group.
If you are using a PTZOptics camera this can be found in the NDI® Config section of the camera’s web interface. Each NDI® device will have this information in a slightly different location. The default Group will be set to “public” which allows the source to be seen by any NDI® receiver on the same network. If you delete “public” and replace it with something unique such as “RedSnapper10,” the NDI® source will only be discovered by receivers also joined to the “RedSnapper10” Receive Group with Access Manager. Receivers can be joined to multiple NDI® Groups by simply using “,”. For example, “RedSnapper10,RightStage” would be joined to both RedSnapper10 and RightStage NDI® Groups.
Once you have set up your NDI® Group assignment on your NDI® Source, you now need to use Access Manager to “join” those NDI® Groups. On the NDI® Receive Groups tab click “New” and it will allow you to join specific NDI® Groups by simply entering the same NDI® Group Name used on the NDI® Sources.

If you click “OK” your NDI® Software will now be able to see the NDI® Sources joined to RedSnapper10 even though other PCs are not able to access them.
The Remote Sources feature allows you to create static entries for devices across your network, or even those accessible via public IPs or Dynamic DNS. Remote Sources is also an easy way to name and group your sources.
Please Note: If you are experiencing simple discovery issues, defining the NDI® source in the Remote Sources section should solve basic discovery issues. Note that discovery issues can be indicative of other network issues that could prevent reliable use of NDI®.
To add a new “Remote Source,” click on the “New” button at the bottom of the “Remote Sources” tab. A new window will open to create your remote source entry.
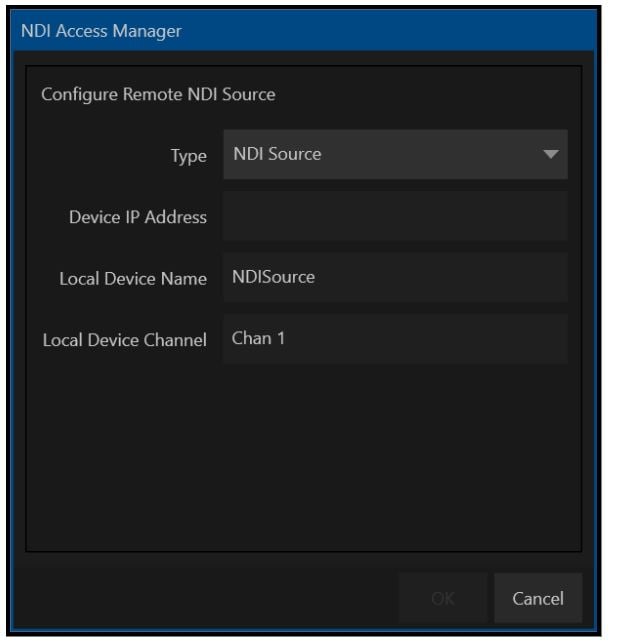
Here are the steps to add a new “Remote Source”:
- Type: Using the Type drop-down menu, select the appropriate option for the device you are trying to configure. If you are using a PTZOptics camera with the original implementation of NDI|HX®, select the “PTZOptics Camera” option. If you are running the latest PTZOptics firmware featuring NDIv4|HX, you should select the “NDI Source” option.
- Device IP Address: This is where you will enter the static IP address (locally or as a public IP) of the NDI® source. You can also use Dynamic DNS entries in this text box.
- Local Device Name: This is a field that allows you to organize and potentially group multiple NDI® sources under a single category. As you add more sources you can use the same Local Device Name so that they all show up together under the same NDI® header. For example, see the picture below with multiple “sources” available under the “DAVIS” Local Device Name.
- Local Device Channel: This is where you can identify the unique NDI® source with a title such as “Stage Left” or “Overhead View” to help organize your NDI® sources.
Click on the “OK” button to complete your configuration.
- Output Groups: This feature functions in a similar way as the NDI® Receive Groups discussed above. The main difference is that your PC is capable of sharing its NDI® outputs with NDI® Groups.
- Advanced: Use this section if you need to “tune” your NDI® network feeds to meet specific network requirements such as using multicast, forcing TCP / UDP to use the NDI® Discovery Server.
- Receive Mode allows you to dictate the communication method for receiving content on your PC and allows you to select between the following options depending on your network configuration and architecture:
- Auto (Recommended)
- User Datagram Protocol (UDP) (Legacy)
- Multi-Transmission Control Protocol (TCP) (Legacy)
- Single-TCP
- Reliable UDP
- Transmit Mode enables multicast sending from your PC over your LAN. You should not enable multicast on your PC or other NDI® sources unless you can confirm the network has been configured to support the use of multicast traffic.
- Discovery Server allows you to run a free application that acts as the central point for NDI® discovery across a network.
NDI® Discovery Server
Using the NDI® Discovery Server may help mitigate certain issues related to mDNS traffic on computer networks. This guide will demonstrate how to install and start the NDI® Discovery Server and show you how to connect your cameras and computer to the server.
- The NDI® Discovery Server is located in the NDI® SDK. Download the NDI® SDK here: https://www.ndi.tv/sdk/
- The NDI® Discovery Server is a lightweight application that can run on your computer. You will need to know the IP address of the computer on which it is running. We recommend setting a static IP address on this computer.
- Once you have downloaded the NDI® SDK, you will need to navigate to the Discovery Server folder:
C:\Program Files\NewTek\NDI 4 SDK\Bin\Utilities\x64\
- The file is “NewTek NDI Discovery Service.exe”. Doublec lick on the application to start the NDI® Discovery Server. You will see a window like the one below:
NDI® Discovery Server..
- There are zero NDI® Sources and zero NDI® Listeners.
- Navigate to the NDI® Config section of a NDIv4 camera. You will enable the Discovery Server and then enter the server’s IP address.
NDI® device with NDI® Discovery Server capabilities.
- After applying this information and rebooting the camera, you should see “1 Source” listed in the NDI® Discovery Server. This is your camera:
NDI® Discovery Server shows an available source.
- Point your computer to the NDI® Discovery Server, open the NDI® Access Manager, and click on the Advanced tab.
- Select “Use Discovery Server” and enter the IP address of your discovery server. Click “OK”.
- Open NDI® Studio Monitor and a “new listener” will appear in your NDI® Discovery Server.
NDI® is now using your computer for discovery instead of mDNS. Follow this process for all NDI® sources and listeners on your network. Access updates to these instructions in articles written by Matthew Davis at: help.ptzoptics.com.
Key Takeaways:
- NDI® Access Manager is a tool used to group NDI® sources.
- NDI® Access Manager allows you to increase the security of your IP video system.
- Use NDI® Access Manager c to organize r a specific group of NDI® sources that are transported over the public internet using NDI® Bridge.
- NDI® Discovery Server can help you improve NDI® source discoverability in certain cases.

Continue reading