Live Streaming Your Podcast
Written by Paul Richards on September 11, 2018
Live Streaming your Podcast
Guess what? Paul has created an entire video tutorial course on how to setup your podcast and ensure it’s ready for live streaming. The course outline is included below along with pictures and video tutorials. The course is also available to take on UDEMY here.

How to Live Stream your Podcast
Creating a Professional Podcasting Studio
- Introduction to the Course
- Behind the Scenes in our new podcasting studio
- Podcast Distribution and Marketing Strategy
- How to EQ a Podcast
- Increase Podcast Production Quality with a Noise Gate and Expander
- Using a compressor and/or limiter for your podcast
- Podcasting VST3 plugins and ASIO audio drivers
- Adding sound effects and a physical Sound FX control board to your podcast
- Setting up a mix minus for your podcast
- Adding remote guests into your podcast
- Post production for your Podcast
Introduction to this course
Welcome to our brand new course on how to create a professional podcasting system for your business. My name is Paul Richards and I have been in the audiovisual technology industry for over 10 years. I have taught over 15,000 students with over 20 online courses focusing on live streaming, video production and online marketing. By taking one of my courses you will learn in depth how our company uses live streaming video production and podcasting technologies to enhance our presence online. Our company has been podcasting for over year now and has recently decided to invest in a brand new podcasting studio. This course will include technical learning and marketing focused content to provide you with an actionable pathway forward to creating an amazing podcast for your business.
This course will start with a brief introduction to our brand new podcasting studio. When we set out to build our podcasting studio system we had several goals in mind for business. The podcasting system first and foremost had to create high-quality audio for our recordings. We need to build a system that we could configure for our space but also “set and forget” for on-demand use with minimal technical support. We also wanted to minimize or eliminate all post production required for podcasting allowing us to streamline our content production workflow. We also need the ability to bring in remote guests into our podcast for interviews from around the world., Finally our team had a goal to keep the podcast find it include some intuitive audio sound effects control system like you may have seen on television or heard in radio.
-

- Podcasting Expert Introduction
-

- Podcasting System Build Goals
-

- Tech Setup
Podcast System Goals
- Create High Quality Audio Recordings
- Easy to use “Set & Forget”
- Minimize or eliminate post production
- Accommodate Remote Guests
- Include intuitive sound effect control system
- Ability to live stream video and audio
As we take you on a behind-the-scenes tour of our brand new podcasting studio, this course will take time detail why we have selected specific hardware and how we tune the selected software for optimal performance. We will explain how we have achieve the goals set for podcasting studio so that you can easily set up your own podcast for your business. If you would like to set up an easy to use podcasting system that will sound professional this course is for you.

Learn how to start a podcast
Our podcasting system behind the scenes
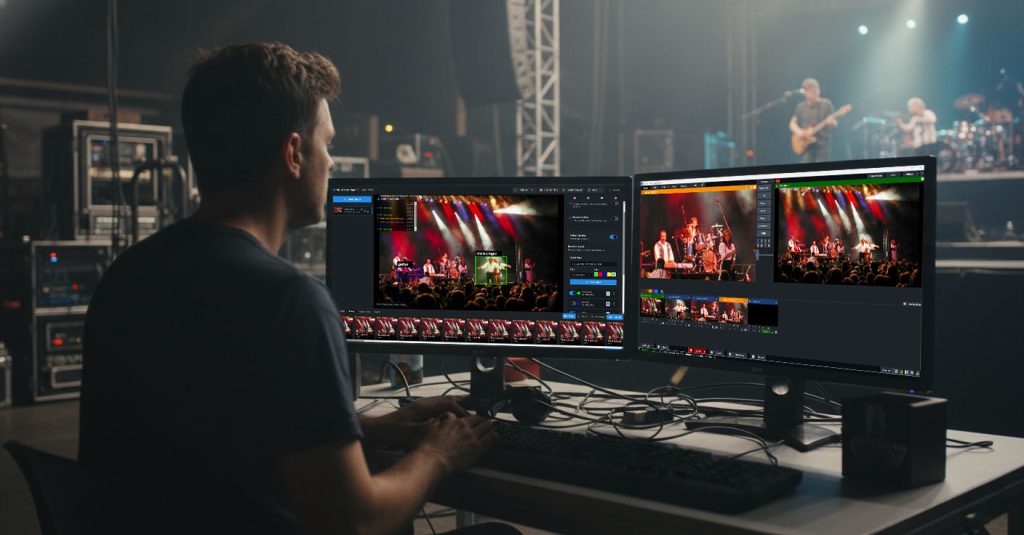
Here at our business we live stream a fully interactive video production with our own equipment three days a week. We leverage both Facebook live and YouTube to engage with our audience and create content that fuels our inbound marketing strategy. We now use podcasting for interactive posts show that is also live streamed but available to be uploaded in podcast format. We have found that our podcast reaches a whole new audience of engaged listeners around the world. Our marketing strategy combines our live video content, with our podcast and distribution through blogs and social media. The podcast is become a key component to this overall marketing strategy allowing us to connect with guests who potential he do not want to be shown on video or a more comfortable in a conversation for tha The podcast is become a key component to this overall marketing strategy allowing us to connect with guests who potential he do not want to be shown on video or more comfortable in a conversation format. We will cover the marketing strategy in an upcoming video.
Our podcasting studio has been built for four people to join us in house and up to eight additional callers from around the world. Our podcasting studio has also been built to seamlessly integrate with our live streaming system allowing us to live streamed any platform during our podcast. With four microphones, four headsets and four adjustable boom stands, the stage is set for a podcasting studio. But there’s a whole lot more technology to learn how to use to set up a system like this properly. Luckily for podcasting, you generally just need a digital audio mixer to handle the heavy lifting.
We have selected the SHURE SM7B podcasting microphones for a podcast studio. These are the microphones that you will see in the highest end radio and podcasting studios around the world. Our microphones are connected to a digital audio mixer which connects to all of our headsets for each podcaster. Our digital audio mixer is also connected to a Windows based computer running or video production software and our audio recording software. We will cover the video production an audio recording software in an upcoming video in this course.
Each headset receives what is called a mix minus audio signal from the digital audio mixer. This means that each podcast are sitting at the table will receive a custom mix of audio inputs in their headphones. This is done so that each participant can hear everyone else except their own microphone. This way each podcast or can hear everyone else and all the audio effects coming from our computer.
Our computer is running a video production software called vMix. There are many different video production software is available and you may only need audio recording software depending on your goals for this project. Since we will be live streaming hour podcast to multiple content delivery network we have our video production software in line connecting to our audio recording software. Our video production software can play audio files during our podcast at anytime. To make the process of calling audio files and playing them during our podcast easier we have a midi controller keyboard. This custom key interface from a company called xKeys allows us to have custom buttons for each audio effect. We have custom buttons to play our intro segment special sound effects and muting microphones on demand.

Digital Audio Mixer for Podcasting
To actually record our podcast we are using a free program called audacity. One of our goals for this podcast was to reduce or completely eliminate time spent in post production. . to do this we have build a live radio broadcasting style system that applies all audio effects live and therefore does not require much post production we are using VST3 plugins which is the latest live audio processing technology. VST3 plugins allow us to process our audio directly from our digital audio mixer in real time. This is ideal for live streaming and reduces the need for post production in our recordings. We will discuss more on exactly which VST3 plugins we are using and how they work in the future video. These VST3 plugins allow us to produce live high quality audio productions that used to only be possible with many hours of post production.
We have also tuned our digital audio mixer with some basic EQ, compression and noise gate settings to further reduce the need for post production. By combining basic audio processing on our digital audio mixer and advanced audio processing with our VST3 plugins hour podcast is ready for live streaming and recording without the need for advanced postproduction. We will discuss in more detail how do use an EQ a noise gate and a compressor on a digital audio mixer in another video in this course.
Once our podcast has been recorded in audacity we apply some very basic normalization and compression effects. These effects should take less than one minute to process it simply enhance the Podcasts overall readiness for distribution. Sometimes we may perform other minimal post production a fax or editing such as deleting the first few seconds of silence in the recording that are are unneeded.

Digital Audio Mixer for Podcasting
How are podcasting studio has a television connected to our Windows based computer running a video production an audio recording software. We will generally use this computer to display PowerPoint which will keep our team on topic. When we are live streaming or podcast we also have the ability to interact with a live audience and answer questions. The entire system cost less than $5000 and we will outline in more detail various options for equipment selection. In our next video we will discuss the distribution and planning of a podcast for marketing perspective.
Here is a complete list of all products purchased for our podcasting system:
| MNF | DETAIL | PART NUMBER | MSRP | QTY | FINAL COST |
| SHURE | Shure Podcasting Headphones | SRH240A | 59 | 4 | 236 |
| SHURE | Shure Podcasting Microphones | SM27 | 399 | 4 | 1596 |
| SHURE | Windscreen | A32WS | 19 | 4 | 76 |
| BLUE | Blue Compass Premium Tube-Style Broadcast Boom Arm | B078MLBGRM | 99 | 4 | 396 |
| ASHLY | ASHLY DIGIMIX18 – 18 Channel Digital Audio Mixer | 899 | 1 | 899 | |
| ASHL | ASHLY DIGIMIX ASIO USB Card | USB-3018 | 189 | 1 | 189 |
| CRS | Intel NUC i7 | NUC-I7-NUC6I7KYK | 1399 | 1 | 1399 |
| vMix | vMix Basic HD | VMIX-BASIC-HD | 60 | 1 | 60 |
| Cables | Misc Cables | Cables | 45 | 1 | 45 |
| TOTAL | $4896 |
Distribution and Marketing for Podcasts
As we mentioned in the earlier video live streaming is essential to our marketing strategy. Podcasting is actually a secondary benefit to our main live video productions that we record and stream each week. Our podcast allows us to reach a larger audience of engaging listeners around the world that we would otherwise be missing with simply live streaming video. Our strategy includes all my marketing with both Facebook and YouTube using your video content to promote calls to action which Drive new leads to our company. This same strategy is used in our podcast. Our podcast is used to deliver value to our listers surrounding our brand or product or a related topic in the industry. This process of delivering value increases our likelihood of converting prospects into new leads and finally into new customers. If you were interested in learning more about our in about a marketing strategy that leverages live streaming and podcasting consider reading my book “live streaming is smart marketing.” I will include a free PDF of this book in the notes of this course.
Our company uses Podbean as a podcasting service which simplifies our distribution. It is possible to use free audio hosting solutions such as SoundCloud which we also use for our podcast. Podbean also integrates video podcasting into their hosting solution which is ideal for us. Podcasting hosting solutions crate and easy up loading platform to optimize your podcasting distribution. When you are planning out your podcast you should think about the categories in which your podcast is the best fit. Adding your podcast to the proper categories using the correct keywords and creating enticing titles will increase your chances of being found online.
We have found that promoting our podcast with our live stream available on both YouTube and Facebook is the most effective way to grow your audience. For some reason, most of our audience is visually oriented and they like to watch our live show more than they like to listen to it. So we have been able to leverage this trend and enhance our podcasting audience by live streaming every episode. We will generally produce a visually oriented live video production for the first part of our show and end with an audio oriented production for the post show. What’s a recording is made we can upload it to our podcast and distribution site to receive many downloads and lessons that we would not otherwise have without the podcast. Overall our podcasting experience increases our audience by 10 to 20%.
Learn about how to EQ a Podcast here.
Increase Podcast Production Quality with a Noise Gate and Expander
A noise gate is used inside a digital audio mixer to temporarily mute microphone before they hit a certain decibel level. By tweaking your digital audio mixer to use noise gates with each microphone you can cut out all kinds of unwanted noises. You can use the noise gate function to effectively silence reduce the level of an input when it falls below a certain user defined threshold. When you were testing out your noise gate you want to eliminate unwanted low-level voices from an individual and put in only allow the loud or signals to pass through. You should talk normally into your microphone and listen for space in between words and sentences. You want your noise gate to turn on quickly when your podcast or starts talking. But you also wanted to mute the microphone when low-level unwanted noises are present. Depending on the podcasters voice level you will need to select a threshold which is essentially a negative decibel level where you want the microphone to be muted.
If you set your threshold too high it can sound natural when the microphone gate opens. To help smooth out the gate in the process there is generally a function called an attack. Attack sets the amount of time from when the input signal reaches the threshold to win the gate actually opens up. You can use an attack setting of 35 to 70 ms to help the gating actions sound more natural. On the other end of the spectrum, there is generally a function called release. Release set the time at the gate remains open after the signal falls back down below the threshold. Finally, you may find a feature called ratio which determines how much the input signal is attenuated when the gate is closed. This ratio allows you to effectively reduce the audio from the microphone instead of complete silence again making it sound more natural. This technology is known as a downward expander and the idea is to extend the signals dynamic range by taking the quieter signals and lowering the level even further.

Noise Gate for a Podcast
Once you have your noise gate and expander sat properly you will find that your podcast will sound significantly better. If you’ve made it this far into our podcasting course you’re starting to hear the find nuances of audio coming out of your microphones and digital audio mixer. I believe you’ll be surprised how much better your audio mix will salad with simple digital microphone gating. Next, we will cover using a digital audio mixer compressor and limiter. This technology will help us further and hands are over all audio production a limit what happens on the top end of the decimal meter.
You may want to consider using a Compressor on your Podcast Audio as well. Learn more about that in this blog post.
VST3 plugins and ASIO audio drivers
VST stands for virtual studio technology which is a standard pioneered by Steinberg. And our podcast we use the ST3 plugins from a company called waves which can be found at waves.com. There is a bundle of VST three plug-ins called vocal which we use to transform our podcast vocals into radio quality voices. It’s incredible to me how intuitive these plug-ins work. VST3 plugins take all the heavy lifting out of audio processing and make it possible for regular podcasts to have simple Controls that perform advanced audio processing tasks.

VST3 Plugins for Podcast
In order to get the most out of VST3 plug-ins, it’s important to understand another technology called ASIO. ASIO is another technology pioneered by Steinberg which stands for audio stream input output. When you were searching for the digital audio mixer I highly suggest find the one that supports ASIO audio drivers over USB. ASIO audio drivers allow you to bring in each audio input into your recording or video production software individually as opposed to a single sum of all input. This allows us to apply unique VST3 plugins to each audio input as needed. Regular audio mixers with USB may only allow you to connect you all are you imports and they do not allow you to individually interface with each audio source.
Whether you have ASIO drivers or not, you can still use VST3 plugins to enhance your over all audio production. One of the first VST three plug-ins that would recommend using is called the DeEsser. Have you ever listened to a podcast where excessive uses of the “ess” and “shh” sounds ruin the audio quality? These undesirable high frequencies generally pass through the EQ process and produce harsh sounds to the ear that can be draining for listeners. Luckily, the DeEsser remove these high frequencies while preserving the integrity of your microphone source. What I really like about this plug-in are the presets that come for both male and female voices.
The next VST3 plug-in i suggest for podcasting included in our vocal bundle is called the Renaissance channel. This plug-in also includes presets for male and female vocals the combined EQ, compression, limiting and gating into a single convenient interface. After much testing of our podcast vocals, we like to Combine renaissance axx with Renaissance channel. Renaissance axx plug-in has a very simple threshold and gain controls that will boost the overall robustness of your podcast vocals.
The great thing about all of these VST3 plugins that they’re built for live sound processing. This means our audio is already processed and ready to go by the time it is inside of our audio recording software. If you were using all of the techniques we’ve talked about inside your digital audio mixer and these VST three plug-ins your audio is going to sound great and you have reduced and/or eliminated the need for post production of your podcast audio.
I do have one final VST3 plug-in that I would suggest using especially for podcast participants with low voice volume. Waves.com produces a VST3 plug-in called vocal rider which is an amazing timesaver. This plug-in automates the process of adjusting your vocal levels within a certain range that you can set. Well, this plug-in is somewhat expensive costing $59 it will keep steady vocals and dialogue levels automatically replace the need for a person to continually adjust levels on your digital audio mixer. The vocal rider plug and works in real time there’s no latency and the performance happens faster than any human could ever process. The effect is incredibly steady vocals and levels in your podcast regardless of how far your podcast participants are from the microphone.
Now that we’ve tuned up or digital audio mixers and in here star audio with VST3 plugins let’s talk about adding sound effects to our podcast.
Adding sound effects and physical controls to our podcast
One of our high-level goals for our podcast to keep it fun and entertaining. Everyone on our podcast team agrees that are audio effects board is the most fun part of podcasting. Being able to quickly hit a button that will play MP3 file with audience applause a robot voice or bell ringing add energy to our conversation. But the only way for this to work in a group podcasting setting is to have a physical keyboard interface. In order to achieve this type of interactive soundboard fax we have used the xKeys USB controller. This controller allows us to create custom buttons map to the exact MP3 files that they represent.
The design of our xKeys controller includes custom keycaps that allow us to draw and write exactly what each key represents. So the entire button pad is completely customizable. Once our xKeys controller is plugged into our windows computer via USB we can map the keystrokes to specific audio files in vMix. I should note that vMix is not the only video production software that supports hotkeys for this type of functionality. You can use a software called wirecast, xSplit or OBS to map keyboard functions to playing audio files.

Our windows computer has a 3.5 mm audio output which is connected into one of the inputs in our digital audio mixer. In our digital audio mixer, our windows computer is set to input five. This input is then mapped to each of our auxiliary audio outputs for our headphones. Therefore when we are playing an intro clip background music or audio affect everyone in our podcast can hear when it is playing. We also virtually send the audio output of each one of these audio files into our audio recording software. This way everyone on our podcast can hear the audio and it’s being recorded for distribution later. The audio is also available to our live streamed audience via an RTMP stream. Finally, if we have a remote guest calling in they will receive this audio as well. We will cover bringing remote gas into your podcast and an upcoming video.
One tip I have for bringing an audio fax is generally to turn down the audio volume on each clip. We use a service called audioblocks.com to download from a library of audio files for our podcast. Audio blocks.com is a subscription-based service that provides royalty free audio clips which is ideal for our podcast. Generally, these audio clips are fairly loud and they do not mix well with our podcast voices unless they are turned down at least 25 to 50% of the original volume.
Now that we’ve covered audio effects let’s talk about mix minus in our next video.
Setting up a mix minus for your podcast
Mix minus is a term describing the process of creating an audio mix that subtracts specific inputs for a unique output. Mix minus is used in podcasting to subtract podcast participants own microphone from their return audio mix inside their headphones. I highly suggest purchasing a digital audio mixer so this mix minus solution can be handled all inside your audio mixer. I would also highly suggest labeling each cable plugged into your audio mixer including the microphones and headphones. In our podcasting studio, we have four sets of microphones and headphones. This means we have a cables plugging into the back of our audio mixer and each one is labeled with its corresponding number. Our digital audio mixer can have up to eight customizable auxiliary output for headphones or other speakers. Inside or digital audio mixer we can select exactly which impacts we would like to be mixed together and sent through these auxiliary outputs. Our podcast also has one additional audio input coming from our computer with all of our audio effects. Therefore each auxiliary output receives everyone else’s microphones and the audio effects but not their own microphone. There is nothing more distracting than hearing yourself back into your own headphone set when you are trying to formulate a conversation.

Podcast Mix Minus Setup
Creating custom audio mixers becomes more complicated the more podcast participants you have. In our next video tutorial, we will talk about adding remote guests into your podcast. These guests will also need their own mix minus which is simply set up through video production software.
The following four step process will help you set up a mix minus system that will be “set and forget”.
- Label all microphone and headset cables
- Plug all microphone and headset cables into your digital audio mixer in their corresponding inputs and outputs
- Select your first auxiliary audio output mix. This mix should include all audio inputs except the microphone that corresponds with this headset.
- Repeat this process for each auxiliary audio output mix
Now that we have our mix minus set up properly we will move on and adding remote guests into your podcasting system.
Adding remote guests into your podcast
Many podcasts use Skype to bring remote guests from anywhere in World into their podcast. This can be done by running Skype on a Windows or Mac computer and plugging the inputs and outputs into your digital audio mixer. You will plug your inputted audio output into an input on your digital audio mixer which will allow you to hear everything coming from Skype. You can create a unique auxiliary audio output from your audio mixer into the microphone of your computer so that the far end guests can hear you in Skype.

Adding remote guests for vMix
Our podcast is leapfrogging this technology setup and leveraging video production software as the core of our audio effects engine already. We already have an input from our Windows based computer in our digital audio mixer. The video production software that we are already running called vMix supports up to eight video callers with integrated mix minus. Wirecast for Mac users also already includes this support for remote guests.
We enjoy the way our remote collar set up works because we live stream hour podcast with video. In this way if our guests are comfortable sharing their video and audio we can provide a much more appealing visual presentation. Using video production software like vMix or wirecast at the heart of your podcast has many benefits. I will include a link to our webinar explaining how her podcasting system is connected to a larger broadcast studio for this use case below.
Post production for your Podcast

Podcast Post Production Compression
The beauty of our podcasting system is that we have minimized the need for post production. With that being said, the sky’s the limit with post production and you can spend countless hours erasing every single breath in your podcast recording. for the purposes of our podcast, we put all of our work in the up front design of our audio system to reduce the need for post production. The only post production that we will generally spend time on is trimming the front and back of our recording and applying a normalization and compression to the entire re The only post production that we will generally spend time on trimming the front and back of our recording and applying a normalization and compression to the entire recording. . We do this basic post production podcast editing with a program called audacity. Audacity is available for free for both Mac and Windows but there are other digital audio workstation software packages that include more advanced features such as isolated recordings for every single input (assuming you have a mixer supporting ASIO USB drivers).
Generally when you record a podcast the audio is uncompressed but when you upload it to your podcast hosting solution they’re looking for an MP3 file. By default audacity Will require a plug-in called LAME to export MP3 files. Simply Google lame for Audacity to find the required files you will need to export MP3.

Post Production for a Podcast
If you have followed all of our tutorials on audio mixing and VST3 plug-in set up you should have minimal post production for your podcast. The result should be an amazing sounding podcast for all of the voices from your podcast participants. At this point you may choose to amplify the signal slightly but generally, the recording you have should be ready to publish.
Learn more about setting up a live streaming studio
- Check out our complete course for live streaming your podcast. This article includes everything you need to know about producing a podcast and live streaming that content here.
- Tips for setting up your next live streaming studio - here
- See how we setup our live streaming studio lighting - here
- Here is our review of the ASHLY DigiMix 18 which a great mobile audio mixer. See how to use ASIO audio drivers and live stream a music festival - here
Learn more about setting up a Podcast

Continue reading


