Unofficial Guide to Wirecast, Chapter 3: “Wirecast Interface Overview”
Written by Paul Richards on March 22, 2021

Wirecast is designed to be flexible. Know upfront that there are many different possible video production workflows. When you first load the software, it may help to experiment with the screen’s layout to get a feel for the possibilities. From the Layout menu, you can choose the layout of your main window. From the very top of the menu, you can turn on or off the Final Mix audio controls, shown to the left and right of the upper part of the window.


Show Live and Preview, Show Preview Only, and Show Live Only allow you to toggle through the display modes showing one or two views in the upper window. Which option works best for you will depend on your Wirecast production workflow. These options can also be controlled by the green and red selection buttons in the screen’s upper right-hand corner.
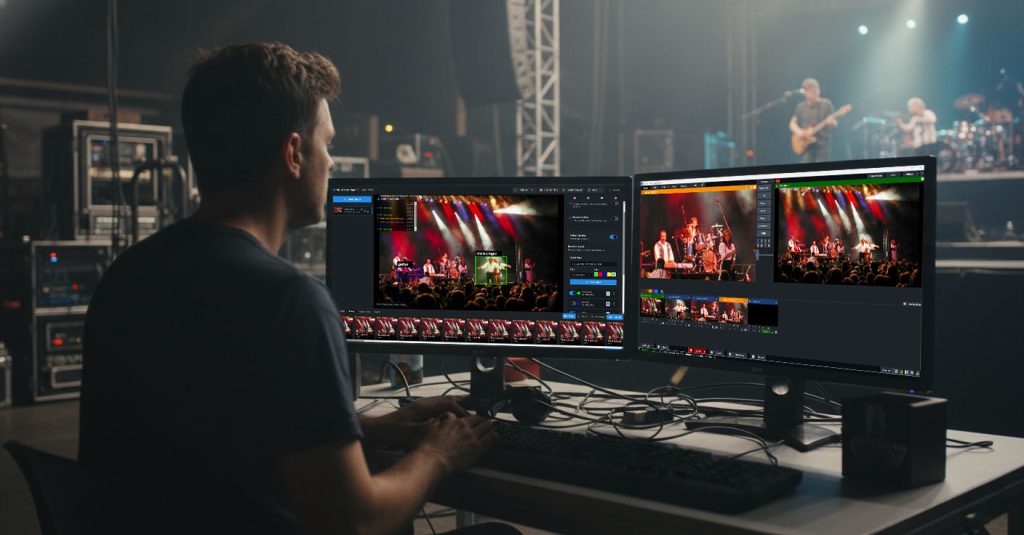
The top half of the interface is the Broadcast area. This is where you can view the Preview and the Live Output.
Preview
When displayed, the Preview window shows what will go to your live broadcast when you press the transition button. Within the Preview window, you can manipulate an image using the handlebars to adjust its size, position, and rotation. These changes will not be reflected in the live view until you press the transition button.
Live
The Live window shows what is being sent to the output of your Wirecast production. Whether you are recording or live streaming, this is what is being captured. The Pro version of Wirecast can also record multiple shots at once using the ISO recording feature.
Audio Levels Mix
To the left of the Preview window and the right of the Live window are the audio meters. With these, you can monitor and adjust the audio gain. By default, the audio levels in the preview screen will not play through your headphones. When the audio levels are muted you will see a gray headphone icon with a strike through it. When the audio levels are active you will see the headphone icon in green.
![]()
![]()
![]()
![]()
Below the audio levels next to the Final Mix is a speaker button and a headphone button. The speaker button is used to mute the audio of the whole broadcast and the headphone button mutes the audio generally used for monitoring the broadcast. In this way, you can turn off your headphones for monitoring the broadcast and toggle between monitoring an audio source in preview. Most users only monitor the broadcast output for simplicity.
Shot Manager Box
To the left of the Preview Window is the Shot Manager box. If it is not there, click on the two arrows on the main window’s far left. The Shot Manager is hidden by default to save space. There are tabs for shot layers within this box to edit the shot’s layer properties, audio, chroma key properties, smooth transition properties, and system device properties. The content of these windows will vary depending on the shot selected in the Main Shot List.
This is the area of Wirecast where you can customize the media you are working with. For example, you can layer together multiple pieces of media together and build one awesome shot that you can transition to with a click of a button. It is here that you can chromakey out a green background and manage the layers of your production to create a virtual set or dynamic scene.

Transition Bar
Between the Live and Preview windows and the Main Shot Layers is the Transition Bar. The Transition Bar is covered in the next chapter. This area controls switching from one source to another and enables you to choose transition styles and effects.
Main Shot List
At the bottom of the Wirecast interface is the Main Shot List consisting of five layers organized in rows. Each row is used to mix together media inside of the Preview window before it’s moved to the Live window. You therefore have a choice as to whether you want to build custom shots with multiple layers in the Shot Manager, or use the layering system to build dynamic layouts in real time.
In general, it’s best practice to put your cameras and live capture sources on the bottom layers and your top level graphics on the upper layers. This is because, as you mix shots together in preview, they will be mixed together in a layered system. This is a great way to think about creating dynamic productions that can be updated quickly. Producers can choose a bottom level camera or live video source and then quickly choose middle or top level graphics. A middle level graphics might be a lower third and a top level graphics could be a logo or a social media post.
Advanced transitions can also be managed in the “Smooth Transitions Properties” area of the Shot Managers Box.

Control/Status Bar
Across the top of the interface is the status bar. This shows you the current state of your Stream, Recording, and ISO recording. There are time counters for all three, and the icons change colors to represent the state of the recording or stream.