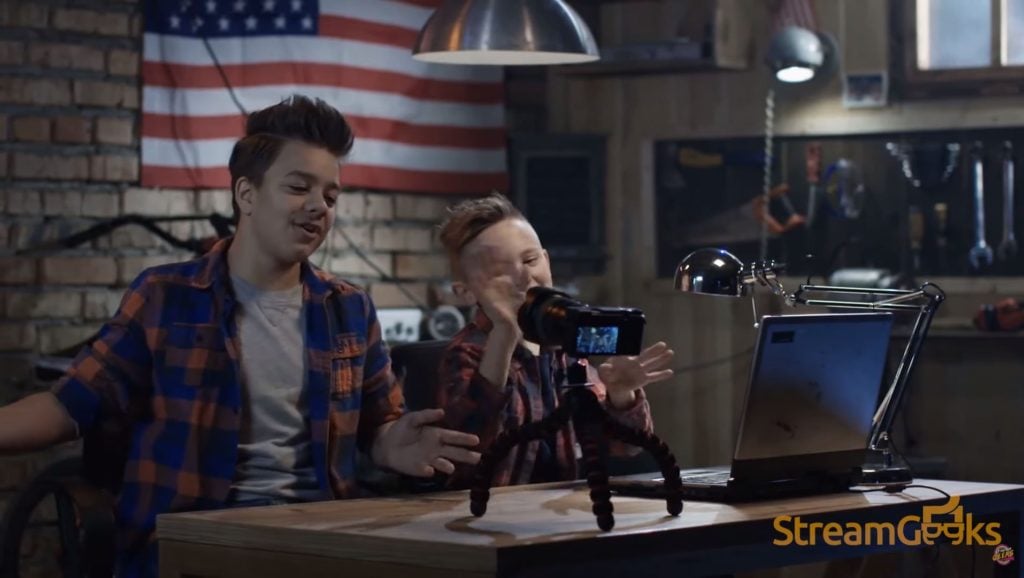
Broadcast Clubs: Using Video Animations
Written by Paul Richards on April 29, 2019
Course Work: Video Animations
Now that we have created a graphic to be used inside OBS as a lower third let’s create a basic video file in Adobe After Effects. Let’s create a simple video intro file that will be 10 seconds in length. We will start much as we did in Adobe Photoshop by creating a new file that fits the pixel resolution; we plan to use in our broadcasting software. Let’s click “New Composition” and you will find the ability to select a custom resolution or choose a preset for HDTV 1080 video as we did in Photoshop. Since we are creating an intro video, you can select 10 seconds for your composition duration. You can choose anything you would like for your background. You could display a combination of videos or images, but to keep things simple we will choose a solid white background.

At the top of After Effects click the Layer drop-down menu and select New -> Solid. You can choose any color you like, or skip this step and put a picture or video into your timeline. Adobe After Effects works very well with all kinds of image files and videos that you can mix together into a creative project. To add a picture or video clip, you will first have to drag and drop that file into your main media organization area generally located on the left-hand side of the program. Now let’s add some text to our composition using the text tool on the top toolbar. Once we have added our text, we can select a color inside the “Character” selection area on the right-hand side of the program.
For this example, we will have the text “Accelerated Broadcast Club Curriculum” fly onto the screen and fade out. To do this, we need to transform the text layer properties over time. Let’s start by clicking the down arrow on our text layer which will reveal the “transform” tab. Every piece of media can be transformed with After Effects and we will be transforming the “position” and “opacity” properties in this tutorial. To transform a property over time, we need to click the clock icon next to the property to create a keyframe. A keyframe shows up as a little diamond to mark a place on your timeline where your property has been set. Once we create our first keyframe, we can choose a new place in time to click and drag the text until the text is fully off-screen. You will notice that each time you move your text at the new time position, a keyframe will be created. This is how you tell After Effects where you want each transformation to happen in time. We can now drag the time slider back to 0 seconds and press the spacebar to watch our animation. Spacebar is a shortcut to start your animation preview. To tweak the animation, you can move around your keyframes in time or change the parameters that each keyframe represent.

Congratulations, you have made your first animated video! Now let’s have the text fade away using the opacity property. Opacity is essential how transparent the selected source is. 100% opacity is normal and 0% is completely invisible. First, we should create a keyframe at the zero second mark. Now let’s click that keyframe clock and do a “Control + C” copy function, to copy that keyframe. Once we have that keyframe copied, we can paste it further along on the timeline to tell After Effects we want to keep the text at 100% opacity until this point. We do this because we want the opacity to remain at 100% until just a few seconds before the end of the video. We can now select the very end of the timeline where we want the font to completely fade out and create a final keyframe. For this keyframe, we can drag the opacity level down to 0%.

Now that we have a nice animated video created, let’s render the video file. Rendering a video file is very similar to saving a graphics file inside Adobe Photoshop except we have many frames of pictures that are being turned into a video file. You will notice that this process takes quite a lot longer than saving a simple image. Let’s click File -> Export -> Add to Adobe Media Encoder. Adobe Media Encoder takes our project file and encodes the video in the format that we select. I suggest using the YouTube 1080p HD video format which uses the h.264 protocol at 16Mbps (We will learn more about megabits per second and bit rates in the next chapter). You will notice the same style of drop-down menu presets that we have seen in Photoshop. Once you have selected your video file quality, you can select the location and name for your file. Click the green play button to start your video render. Now back inside OBS, we can add our video file to our scene by clicking the plus button and selecting the input “Media Source.” I would suggest creating a new scene called “video intro” for this video. Now you can quickly transition this video in and out inside your production.
Tip: Check out the “Hotkeys” section of OBS and assign a few hotkeys for each scene you have selected. Create a hotkey of “1” for your first scene, “2” for your second scene and so on. Also, select the “space bar” for your hotkey representing the transition button. Now you can quickly switch between scenes using OBS hotkeys.
The Basics of Video Production Software
It’s now time to dig into the fun stuff. In this chapter, we will review the basics of video production software. Remember that this book includes a glossary of terms in the back of the book that you can reference as you read through. Let’s start by looking at the most basic of live streaming systems. In this system, we have one computer running OBS, one USB webcam, and one USB microphone.

In this basic live streaming setup, our webcam is connected to the laptop using a USB 2.0 cable and our microphone is connected via USB 2.0 as well. Each of these video and audio devices is considered either an “inputs” or “sources” inside of our video production software. The interesting part about video production software is its ability to mix and match various video and audio inputs together to create a “production.” Given what we have learned thus far in this book, we can take a live camera feed from a webcam and display a custom made lower third graphic over the video. We can also create a custom animated intro video and play that right before our school’s broadcast begins. So, given this foundational level of video production understanding, let’s talk about some of the building blocks we may want to add inside our software to increase the production value.

The picture above is an example of the “add an input” screen that is displayed inside vMix. As you can see the list is quite long. Just to name a few we can add videos, DVDs, cameras, NDI sources, streams, images, PowerPoint files, colors, audio files, audio inputs, titles, virtual sets, web browsers, and even remote video callers from around the world. These are all examples of media that you can bring into your video production and mix together. The process of becoming a skilled director requires the ability to artfully move between right-brain and left-brain thinking. The video production process is a constant balance of creative thinking and technical implementation. The more you practice, the better you will become. The more that you review your productions and prepare, the more confident you will be in the moment.
On the one hand, students have a limitless opportunity for creative thinking and on the other hand, we have real-world technical workflows and time constraints. A comprehensive understanding of how the entire technology setup is put together is important for students to grasp opportunities and constraints from a technical perspective. As students learn how to funnel their creativity, they will learn multiple skill sets that will serve them in school and the real world. Each member of the broadcast club should learn how to leverage camera hardware and computer software technology together to create a visual experience for viewers. As students hone in on their abilities and practice their craft, they will learn how to capture audience’s attention using visually appealing images and sequences of video imagery.

In the picture above, you can see the Union School District’s streaming media elective club at work. They are using a PTZOptics video camera set up in front of a green screen. As you can see, inside Wirecast the school has multiple video inputs used to display supporting graphics and video backgrounds. On a recent interview, Michael Kaelin, the club’s instructor said “There are two middle schools in our district and the other middle school does have a daily broadcast but the whole thing is prerecorded, and I commend that teacher who created the whole program. However, I wanted to do something live and a lot of people confronted me and said just do a pre-recording you don’t need to do it. I said no, there’s something dynamic about the live stream, it’s here, it’s now, it’s flexible, it adapts to changing conditions and now they get it because if someone has a last-minute announcement, we have a streamlined process that can just immediately adapt. You know the weather is the actual weather it’s not saying a day later. So, having the live stream being in synchronous time is really a benefit.”
Kaelin understands the true purpose of live video production and the value students can gain from learning to work in this type of environment. Kaelin says this about starting the club last year “At first, I was doing everything and now I can stand there … I unlock the door, and the kids all have jobs, they’re writing stories, they’re producing stories, doing all the Wirecast, doing all the camera programming, doing everything. And that was the idea, that we wanted to use this as a real authentic tool that’s going to empower kids to take these skills because they’re going to be the ones who are kind of taking this technology and doing new things with it that are blowing our minds…Kids are getting a lot of credit… you’ll hear a lot of adults say oh just let the kids do it they’ll figure it out they know how to do all this stuff. The reality is they don’t they don’t speak the vocab. They’re consumers of technology. They’re not real producers. And what I want them to be when they get out of here is a producer of technology. Consuming it is the fun easy part. But I think actually producing it and creating it really taps into their own their own interests and is the stuff that we need.”
Show Workflow

Let’s take a look at the foundational concepts of a video production workflow for a morning announcement show. Most of the time spent in preparation involves loading up the media that you will be using within your video production software. Once you have an established workflow for the “Core Content” most broadcast clubs will remain fairly consistent. At this point, your club can save a template inside the video production software, which can be used each morning over and over again with updated material. Now that we have reviewed the Griswold High School case study and made our first show introduction video using Adobe After Effects, let’s focus on setting up the “Core Content” of a morning announcement show.
It’s important to make sure that all of the video sources you are using in your broadcast match up when it comes to resolution and frame rate. Depending on the way you are distributing your content, many schools will choose to broadcast their content in either 720p or 1080p to minimize bandwidth requirements. When you choose your project’s resolution, you should be considering the televisions or projectors that are installed throughout your school where students will be viewing the live video. Many schools already have cabling run throughout their building with a television distribution system in place. Some schools are using IP video distribution allowing teachers to connect their computers to a projector or television in their school and run a program to receive the live video. Other schools are recording their morning announcements “live to tape” which is a method of recording the video live before it is sent out via email or dropbox. In this way, the broadcast clubs’ recordings can be uploaded to shared drive such as Google Drive and played by teachers each morning on the classroom computers. Thinking about the end viewers of your live production and the monitors they will be watching it on will help you determine the video resolution you should create for your project.

Once you have determined the video resolution for your project, you can start to build out your production software by adding an input for each of your cameras. Some cameras such as the PTZOptics cameras have a dial on the back of the camera that allows you to set the video output resolution. Once your camera is set to the resolution of our project, you can connect it to your live streaming computer. You can then add your camera input into the video production software by pressing the “add input” or plus button and choosing the camera from the drop-down menu of options. If you have multiple cameras available to our live streaming computer, I would suggest giving each camera a name that corresponds with the devices location or use in your studio.

Next, we can add our audio mixer into our video production software. This is done just like the camera input, but this time we will be adding an audio source. Many analog audio mixers do not support a USB audio output and in this case, a USB audio interface can be used to convert the audio into a useable USB connection. Once all of our live audio and video sources have been added into our software, it’s time to organize all our inputs. It’s important to name each video and audio input inside your video production software to increase productivity. Giving your equipment “friendly” names inside your video production software will help increase communication within your team. Once you have your video and audio sources inside your video production, it’s time to save your work and use this as the basis for your next broadcast.
Many schools like to have a PTZ camera operator work directly next to a technical director that is running the video production software. This is a great way to have one student queuing up the potential camera viewpoints and another student working the input switching. It’s considered best practice to pan, tilt and zoom a camera off-screen. This is done by moving the camera while it is still in preview and therefore hidden from your audience. In this way, your may not realize that you have just one or two PTZ cameras, because they are constantly seeing new angles and viewpoints from inside your studio as your director transitions to each pre-adjusted PTZ camera. Many video production software systems including Wirecast, vMix, Livestream Studio, OBS and the NewTek TriCaster now feature built-in pan, tilt and zoom camera support. This means that the video production operator can set up multiple camera positions as selectable presets directly inside the software. We will include tutorials on setting up PTZ camera controls inside Wirecast, vMix, OBS, and Livestream Studio inside our UDEMY course.

Production Graphics
Now it’s time to add in our graphics. Let’s start by adding some supporting media into our production software that we can position inside our canvas. For this example, we will design a moving graphic for a sidebar and a custom .png file that can be used to display information. This is a style of presentation made popular by the John Oliver Show, and it is used widely in modern news broadcasts. As a student in the broadcast club, I would highly encourage you to think about mimicking what you see on your favorite television or online show. There is nothing wrong with trying to recreate something you have seen done on television. The process of figuring out the way that other television shows are put together will be a rewarding and eye-opening experience.
Eventually, you will realize that the tools you have access to will enable you to create television quality video productions.

First, let’s build our animated sidebar inside of Adobe After Effects. You can find the course files inside our UDEMY course in the Graphics Design section. To start from scratch, you can create a blank composition inside After Effects in the resolution of 1920×1080 and 10 seconds long. To make this animation a little more interesting, you can create a 1920×1080 resolution gradient image in Photoshop. Inside Photoshop, you can simply create a 1920×1080 image and use the gradient tool with tool colors you want to gradient selected. You can drag the gradient tool over your canvas and change the color selection until you have the desired effect. Once you have a nice gradient background for video animation, you can save it as a .jpg file.
Now we can import this gradient image saved as a .jpg file into After Effects by dragging and dropping the file into the media area. Once you have dropped the image file into After Effects, you can drag and drop the file into your newly created composition. Now you can add multiple layers of text that you can animate using the transform position effect. For each layer of text in the tutorial, I have added “ABC2 >> Accelerated Broadcast Club” for the content four or five times for each line. Feel free to add your own custom text in here, so that you can use this file once you are done for your broadcasts. We want the text field content to extend off the canvas because we are going to have each line of text scroll across the screen in different directions. Once you have added the number of text layers that you need, you can begin going through each text layer and transforming the position in After Effects over time. You can start by choosing the first moment in your timeline and drag the timeline bar to the end of the composition. At the end of the composition, you can drag the text to the final part of the animation that you would like it to move toward creating a new keyframe. You should have two keyframes for each layer of text. One keyframe represents the position of the text at the start of our animation and the other keyframe represents the position of the text at the end of your animation. After Effects will then scroll the text through the time that you have selected and you can test this by pressing the spacebar and starting an animation preview.
Once all of your text layers are moving in the way you would like them to, you can render this file as a .mp4 video file using the Adobe Media Encoder. We can start the render by clicking File -> Export -> Add to Adobe Media Encoder. Once you have this file saved, you can bring it into your video production software by clicking the “add input” or plus button and selecting the video source. Now that we have brought this video file into our production software, it’s time to build a scene. Remember to set this video file to “loop” so that it continues to play during your production without stopping after 10 seconds. You can now move your video file to the side of our canvas so that it can be used as a side-bar. You want to position your on-screen talent to be front and center, with supporting graphics to the left or right of where they are positioned. To do this in most software, we can simply click and drag the video file to where we want it to be.

As you can see from the picture above, we have integrated everything together inside OBS. We have our animated sidebar, our informational square and our live camera feed. You can find each of the Photoshop and After Effects files inside our course files folder. Each of these media sources has been layered together with a live camera feed on the bottom layer, the animated sidebar on top of that and finally an informational square on the top layer. If we have multiple informational squares, we can change the information being displayed by adding new squares to our scene. When we are ready to transition to a new square, we can do so using the eye icon to hide one square and reveal another in the preview window. In this way, the director can prepare a list of informational squares and transition to them in-sync with the on-air talent presentation.

Green Screens and Virtual Sets

Now let’s have even more fun playing around with green screen and chroma key technology. Chroma key technology will give us the ability to remove a specific color from a video input. Most studios use a green screen, but it’s not uncommon to see a blue screen as well. When it comes time to set up a successful green screen, it’s all about your lighting. One rookie mistake that many people make is forgetting to light the green screen itself. An effective green screen studio has separate lighting for the talent and the green screen. Most studios use a technique called three-point lighting which requires a key, a fill, and a backlight. Once you are ready to apply a chroma key to your live camera feed, you can open up your camera source in your video production software. Most software today will provide adjustments you can make to select a color and tweak the color key performance. I have found that most chroma key tools are intuitive because they have a bar that you slide until the color you have selected disappears. The first thing to do is use the droplet tool to select the color your live camera feed is producing from your green screen. Once the color you have selected fully disappears by adjusting the chroma key settings, you can start to use your newly chroma keyed video input as a part of more interesting compositions. For example, if your school has a weatherman, you can put his live video feed on top of another picture or PowerPoint slide deck. You can also use more advanced chroma key effects that leverage virtual sets. I have an entire course about using green screens and virtual sets that you can take for free with the coupon code “GREENSCREEN1” at the link below.
Learn about Green Screens and Virtual Sets – https://www.udemy.com/virtual-sets/

Continue reading


