Making a Stinger Transition in vMix
Written by Paul Richards on November 10, 2020
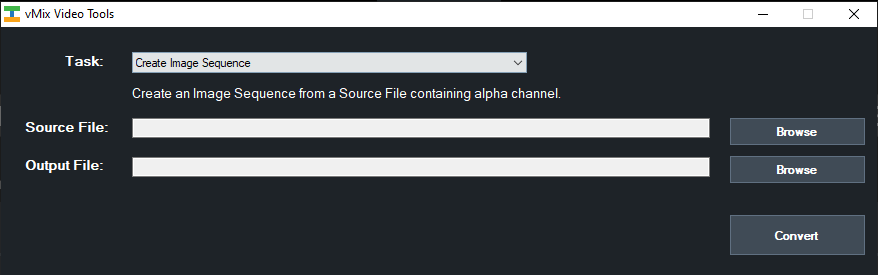
Stinger transitions can be made with “vMix Video Tools” which is a Windows application installed with the main vMix application. This application is used to create an image sequence from a transparent video file. This method of creating stinger transitions is an efficient way to manage stinger transitions because the vMix Video Tools to break down a transparent video file into a sequence of PNG files which is smaller in size and more efficient.
vMix Video Tools
To create a Stinger transition, start by looking for a video with a transparent alpha channel background. MP4 files will not work. You should be looking for MOV or AVI files. Videoblocks.com is a great place to look for video content. Or you can create your own stinger transitions with a video animation software such as Adobe After Effects. When selecting a stinger transition video file, looks for an animation that eventually takes up the entire screen. This is the point where you can set up your stinger to transition to your preview input without the audience noticing.
Once you have a video selected you can select “Create Image Sequence” inside of vMix Video Tools and select your Source File and Output File. Once you load in your video, click Convert. This will create a folder on your computer with your Image Sequence that you can use to setup a Stinger inside of vMix.
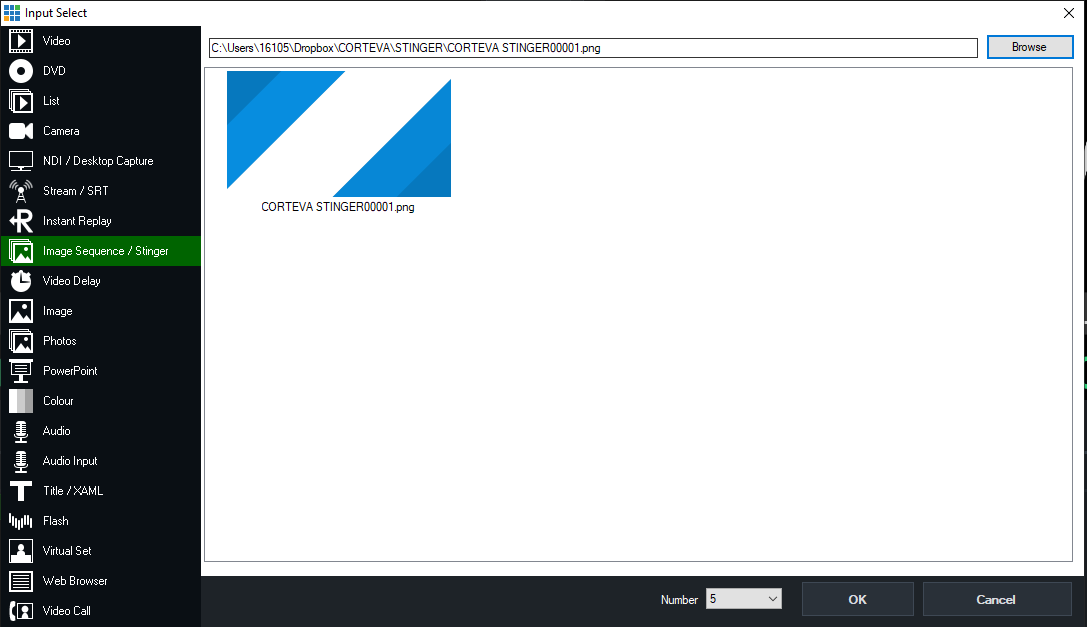
Image Sequence
Inside vMix, you can Add Input and selecting the Image Sequence/Stinger. Once your image sequence has been loaded into vMix, you can click into the overlay section of vMix to set up the stinger details. vMix allows you to set up two unique Stingers in a single production. The most important detail inside the stinger options is the stinger cut point. You can test out your stinger a couple of times to tweak its performance to match the cut point where your animation covers the entire screen fully. In the overlay settings area, you will find multiple tools allowing you to set up the stinger duration, cut points and even its alpha channel properties.
Using Multiple Channels
You can use all four overlay channels at the same time. For instance, if you wanted to add a lower-thirds title, picture in picture video, a graphic, and even another video, you can use all the channels. For even more flexibility, you can use overlay channels with input MultiView sources. You can create a scene of up to ten layers and then assign that to an overlay channel.
Other Features
There are a couple more features of the overlay channels you may find helpful. They both work via a right mouse click. To see and overlay in the preview window, right-click the selected overlay channel on the input you wish to use. When use transition from the preview window to output, the overlay will transition as well. Finally, with a right mouse click, you can zoom a picture in picture overlay to full screen. Once you have clicked the overlay number to add the input as an overlay, simply right-click the same button to zoom it to full screen. Another left-click will turn the overlay off.

Continue reading