How to use vMix Social
Written by Paul Richards on November 10, 2020
vMix Social is an easy way to bring social media content into your live production. With social becoming such a big part of events, these tools will save you time and make sharing social media posts and reactions an integrated part of your production.
Getting Started
To get started, go to Add Input and add a new title. Once you have selected the Title tab, you will see all the available title layouts. Click on the Social tab at the top. You can create your own custom social media title layouts, but you can also use one of the available templates. This will become the placeholder for the information that will come from vMix Social.
vMix Social Inerface
Once you select one of the social titles, you will see how they have been created specifically for social media. The title editor has ready-made fields for the type of information you will want to share from social media. These are placeholders for things like profile pictures, usernames, and social media messages. Some of the templates have a place for a title field. This is something you can enter in this editor, and it will remain the same no matter the data received from social media. Click on the X in the top right to close out of this window. If you want, you can click on that new title input and put it in the preview window to see what it will look like.
Connecting Social Media Accounts
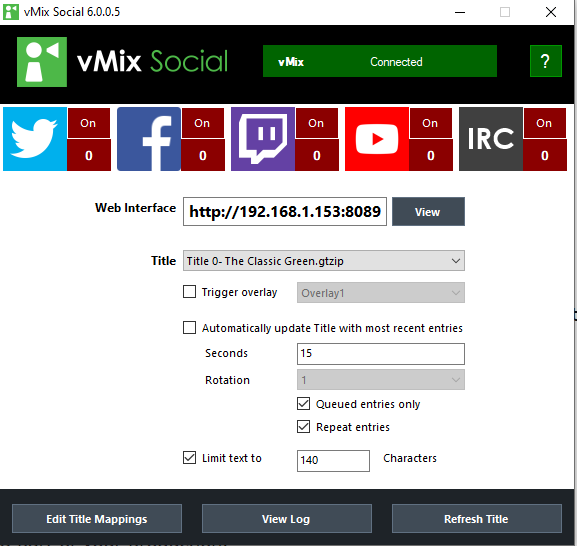
Now it is time to connect to social media platforms to begin populating those fields. Open vMix Social by going to the hamburger menu in the lower right corner of the interface. It will automatically connect to vMix and show “Connected” in green at the top of the dialog box. Below that, you can see all the currently supported social media platforms. Keep in mind that these are subject to change. Social media sites are continually changing their access rules and processes, and some may become unavailable while others may grow in popularity and be added.
vMix Social Web Browser
You can choose one social media platform or as many as you want. Clicking on each logo will give you access to the settings for that platform. You will see that each settings box is different since the various platforms have different login processes and search parameters.
Take Twitter, for example. To get connected, you will log in and then be provided a PIN by Twitter, which you will enter in the next field. Once you are logged in, you can choose your feed type. You may want to collect Tweets around a particular hashtag or search phrase, show a specific timeline, or even favorited tweets. Below that, you can enter your search term or username and make some other preference selections.
You can go ahead and repeat this process for any of the social accounts you wish to use. For Facebook, Twitch and YouTube, you can login to your accounts and select your specific live stream to receive comments from viewers. Once everything is set up and ready to go, you can add your social media title to your production using one of the overlay channels, keeping it in view all the time or only selecting it when you want it to be seen.
Comment Moderation
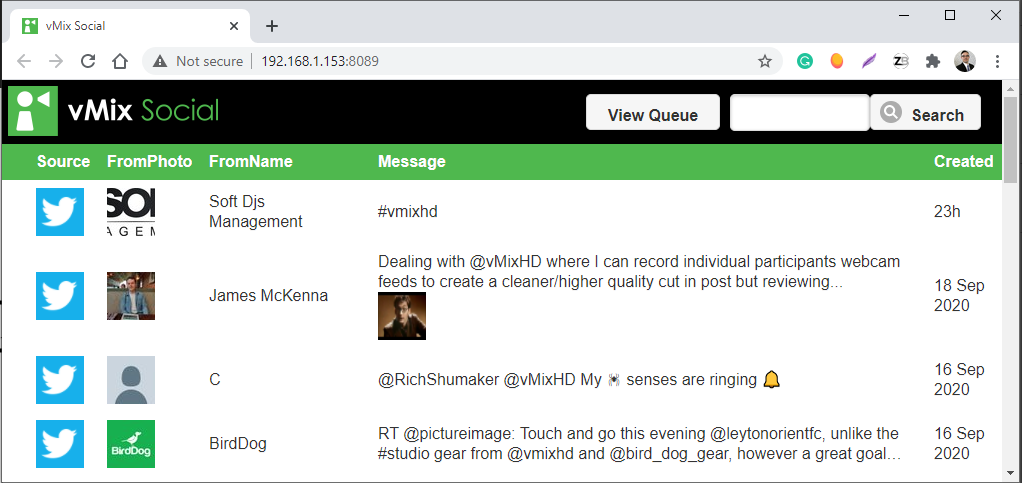
Of course, in most cases, you will want the opportunity to moderate social media posts and comments before they appear in your live broadcast. That is easy to do with the vMix Social web interface. Copy the URL from the vMix Social box into a web browser on any computer or device connected to the local network. The easy to use interface will allow you to select and approve content and send it directly to vMix, where it will appear on the social media title slide you created.
The specific title that will receive this information is the one that you select in the vMix Social application. You have the choice to Send comments directly into that title or build a list that you can manage by using the Add to Queue feature. Many times, you may receive great comments, but you are not ready to share them with your audience. Using the Add to Queue feature you can View Queue at any time to Send comments directly to your title from your curated list.
Start Learning vMix
- What is vMix. Learn here
- Getting Started with the vMix interface here
- Learn how to work with vMix inputs here
- Mixing Inputs Together with vMix Multiview here
- Learn about vMix titles here
- Learn how to mix Audio in vMix
- Learn how to use VST3 audio plugins with vMix here
- Learn all about vMix settings here
- Learn about how to use vMix Full Screen and Multiview here
- Learn how to record video with vMix here
- Learn how to live stream with vMix here
- Learn how to use vMix video overlay channels here
- Learn how to make Stinger Transitions in vMix here
- Learn how to use social media comments in your live stream with vMix Social here
- Learn how to use vMix shortcuts here
- Learn how to use GT Title Editor to make custom vMix titles here
- How to use vMix Call to bring guests in your live stream here
- How to control vMix remotely with the web controller here
- How to use vMix color correction tools here
- How to use virtual sets with vMix here
- How to use NDI with vMix here
- How to control PTZ cameras in vMix here
- Learn how to connect vMix with Zoom using the virtual webcam output here
- Learn how to use automated playlists with vMix here
- Learn how to use data sources with vMix here
- Learn how to use vMix triggers here

Continue reading