Networking for PTZ Cameras
Written by Paul Richards on November 30, 2021
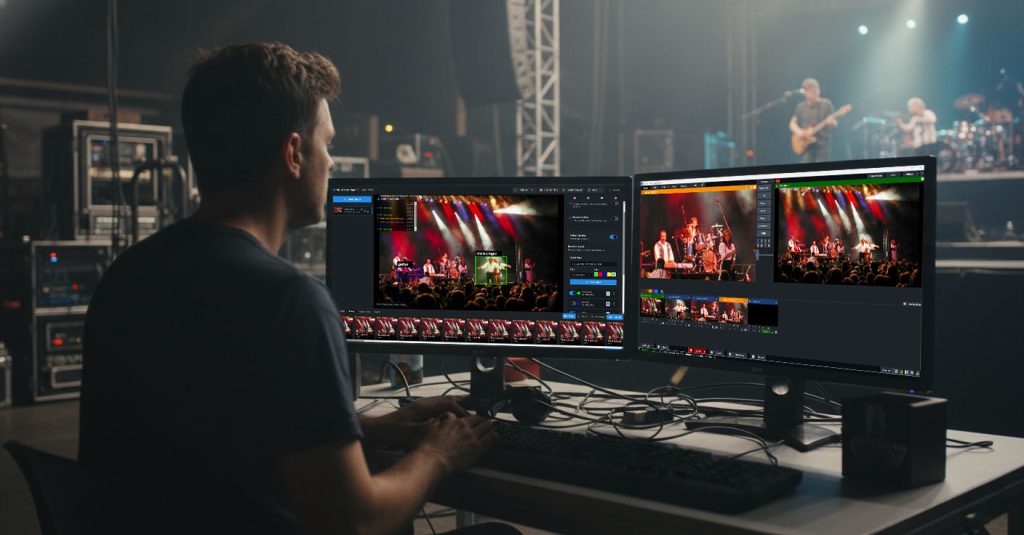
If networking is totally new for you, don’t worry. You likely have a network in your home or office that you can use as a reference to understand this technology. The reason why a network is important to PTZ camera operators is that it can be used for IP video and IP camera control. A network can allow you to view PTZ cameras from your computer, a smartphone, or even a dedicated network device such as a decoder. Some applications such as OBS, vMix, NDI Studio Monitor, and Wirecast combine the ability to connect to your camera over the network, with the ability to control your camera as well. In many cases, using your network can save you money on an upcoming project.
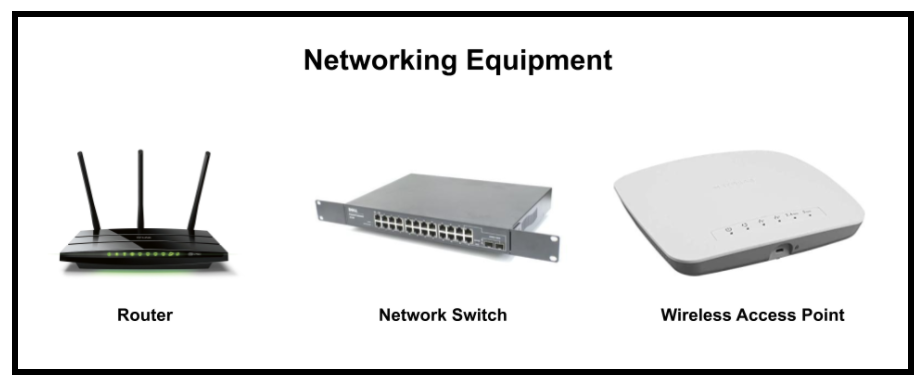
Common networking equipment includes a router, a network switch, and a wireless access point.
Three essential pieces of networking equipment appear above. The router is generally considered the “brains” behind the network because it manages all of the devices on the network. The router is used to address devices on your network with an IP address and it can be used to control the rules that the network operates with. Main routers include a few built-in network ports that allow you to connect devices to the network via ethernet cables. In larger networks, a network switch and wireless access point become important to extend the network’s capabilities. In your home network, you may notice that the router you received from your internet service provider (ISP) includes wireless capabilities. This is ideal for small home networks, but as you can imagine, larger networks connect network switches and wireless access points to extend access to the network to additional devices.
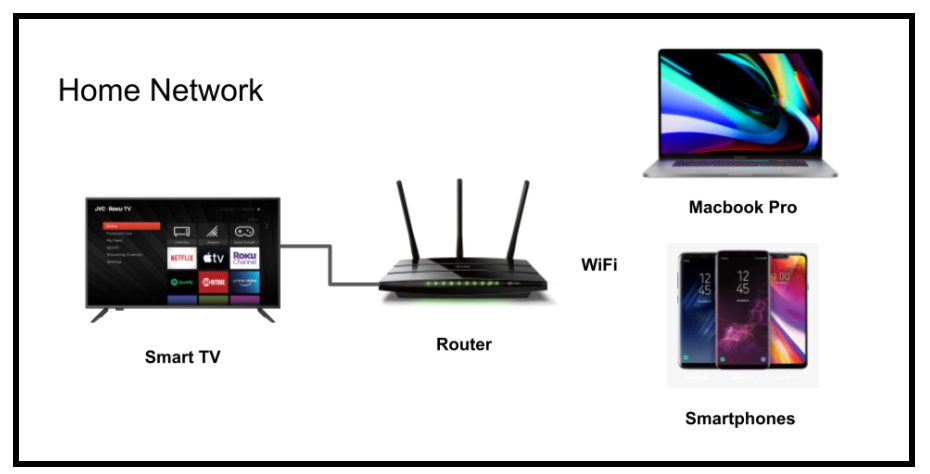
A home network that uses a router to connect to multiple devices.
The example above shows a simple home network where the router is connected to three devices. The first device is a Smart TV which is connected via an ethernet cable. The connection allows the Smart TV to access the internet. A laptop is connected to the router via WiFi. This also allows the laptop to connect to the internet. Each device on the network receives an IP address that the router uses to connect the devices. This not only provides each device access to the internet but also allows the devices to connect to each other. For example, the smartphone can control the SmartTV and the laptop can wirelessly share a screen on the TV. This basic network setup can be expanded to accommodate multiple PTZ cameras, video production systems, and devices designed for live streaming.
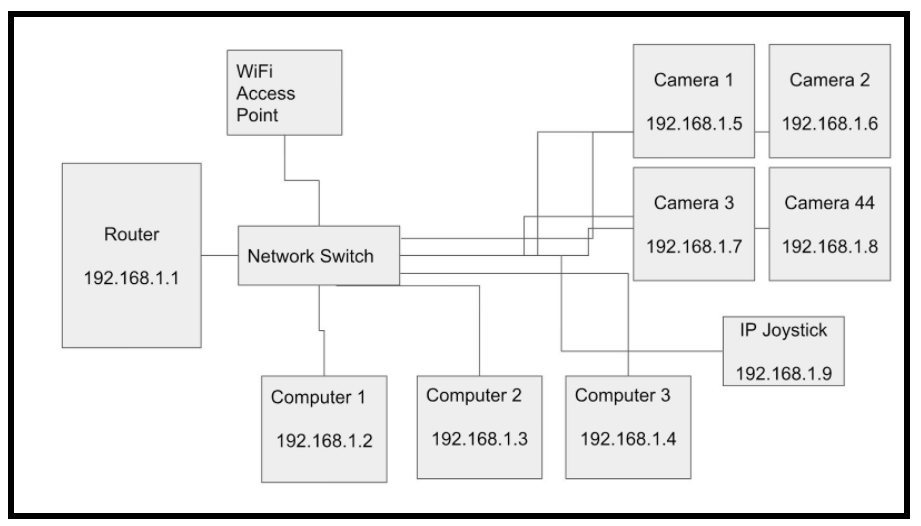
A basic IP network layout with multiple cameras.
The diagram above shows an IP network router connected to a network switch. Network switches are used to connect additional devices to the local area network (LAN) so that they can all communicate. Some routers also include built-in WiFi which allows you to connect your smartphone to the network. An additional WiFi access point is also connected to the LAN in order to extend the WiFi range and wireless connectivity of the network.
To further illustrate how all the devices communicate with each other, notice that each computer and camera has an IP address. You can see that the router has the very first IP address in the network. In this example, the address is 192.168.1.1. Each device on the network has its own unique IP address. This means that each computer, camera, and IP joystick has its own unique IP address to communicate with each device. The first three sets of numbers in the IP address are the same; this is called the IP address range. Each IP address in this LAN has a 192.168.1.xx IP address. The final two numbers are the unique numbers that show their IP address within the larger “IP Range” of available addresses. You can have a maximum of 254 IP addresses on a standard network without adding additional subnets (a subdivision of the network).
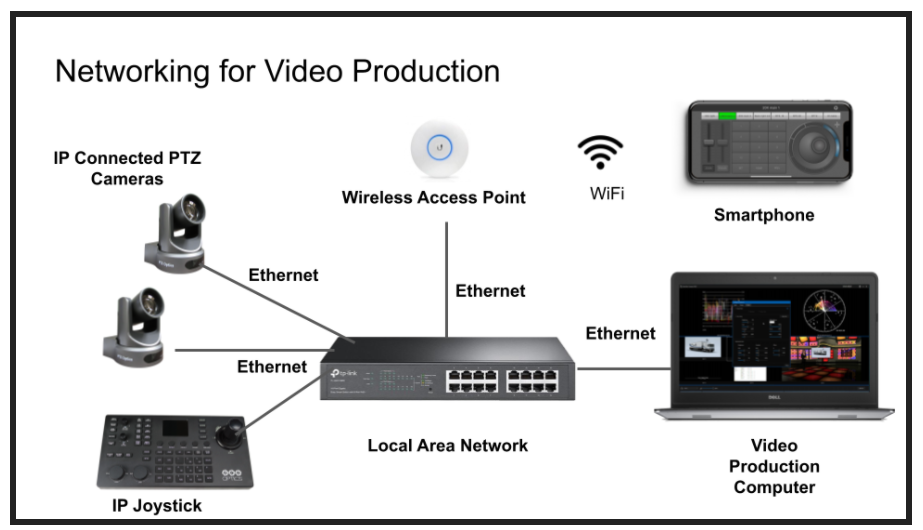
Network setup for IP-connected devices such as PTZ cameras., joysticks, computers, and smartphones.
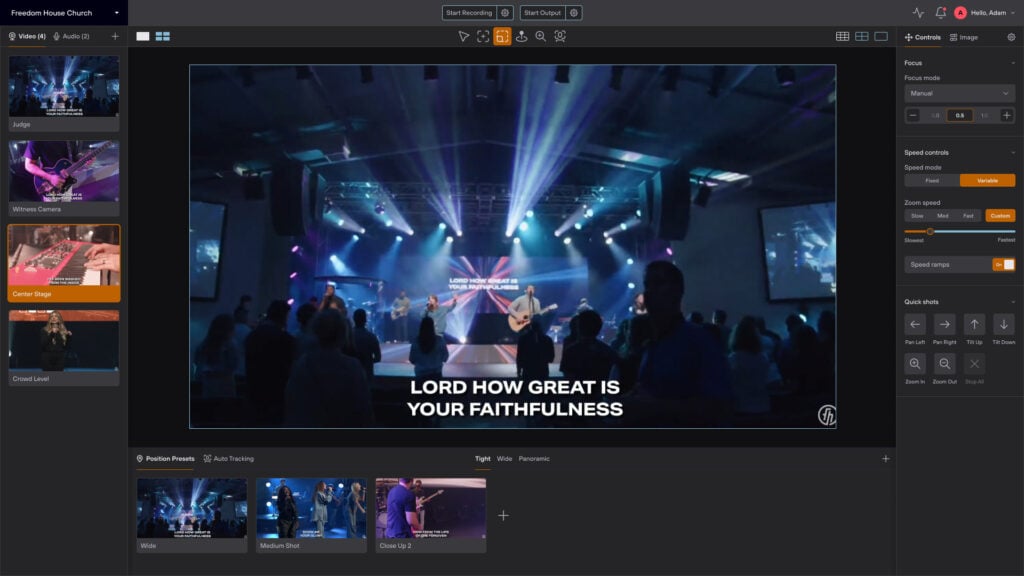
At a high level, you will have software and hardware choices for controlling your PTZ IP camera over the network. Regarding your network connection, you can choose to connect to the LAN via an ethernet connection, or wirelessly via a WiFi connection. Once connected to the network you can control your PTZ camera with video production software that is also connected to the network. A few popular software choices with PTZ controls are Wirecast, OBS, vMix, and LiveStream Studio. These software solutions have PTZ camera controls built directly into the interface. You can also use hardware-based video production switchers such as the NewTek TriCaster or Roland video switcher which support networked PTZ camera controls. Or you may also use a dedicated IP-connected joystick controller such as the PTZOptics PT-JOY-G4 or the new SuperJoy. A popular method of wireless camera controls includes iOS and Android applications. Plus, a popular smartphone solution for PTZ cameras is called PanTiltZoom.
Now that you understand what a network is at a high level, you will likely want to get your PTZ camera set up with a static IP address. A static IP address does not change and therefore it is ideal for organizing and managing your PTZ cameras on the network. It is possible to set up a dynamic IP address automatically, but you should keep in mind that dynamic IP addresses can change when a device is turned off and on.
Earlier in this book, I outlined a simple method for setting up a PTZ camera’s IP address by using the IR remote control. Here you can learn how to use a Mac or PC computer to do the same. For this example, you can use the PTZOptics IP Address Settings Tools available for download at PTZOptics.com/downloads. By default, most PTZOptics cameras have a static IP address of 192.168.100.88 or .99 depending on your camera model. This default IP address can be referenced on the underside of the camera. You can access and update this default IP address to fit your network using the Mac or PC IP Address Settings Tool software.
If you are organizing multiple cameras on your network consider using an Excel or Google sheet to keep track of all of your camera information. You may want to use a specific section of the entire available IP address for your IP video production equipment such as .60-.80. Consider keeping track of basic information such as the camera name, the IP address, and its location.
Keep track of the following information.
| Camera IP | Multicast | Camera Model | Device ID | Location | SDI INPUT |
| 192.168.1.20 | 234.1.2.60 | PT-20X-SDI | Center Camera | North Wall | 1 |
| 192.168.1.21 | 234.1.2.61 | PT-20X-SDI | Side Camera | East Wall | 2 |
Here are steps outlined by the PTZOptics camera support team that you can follow to set up a unique static IP address. The steps may vary depending on the make and model of your PTZ camera. .
- The first thing you want to do to get your camera up and streaming on your network is to connect your camera to power and to an active network port on your network, and power the camera on.
- Next, go online and download the Upgrade tool (IP address setting tool), from the PTZOptics Download Page. This is available for MAC or Windows machines. The program downloads as a ZIP file, so it needs to be unzipped on your machine before you can run it.
- The program uses mDNS for discovery, so if you are using a switch that does not support mDNS, this program may not find your cameras. If this happens, use the IR remote control options above to find the camera’s IP address.
- Once you run the program, you should be able to change the “interface” option in the upper right of the search tab. This allows you to select the different NIC (network) ports on your computer. The program always has some multicast addresses in the interface options as well. If you don’t know which option is your connection to the camera, please take a look at the extras section at the end of this guide to find your IP range, and then select the option that aligns with that range.
- Change your camera’s IP address to be in the same range as your network. The camera comes with a default static IP address of 192.168.100.88. You will need to update that to be in the same range as your network. This should be the first (3) sets of digits from the interface you are using to find the cameras. Our network is set up to be 192.168.111.xxx. We also have a different subnet setup with the 192.168.108.xxx so both IP schemes show up with all our cameras on the network.
- Once you know your IP range you can right-click on the camera you wish to change the IP address for and click “config”.
- You should now be able to set your camera’s IP address to one in the range of your network. You should be able to leave the subnet mask alone unless there is a reason for you to change it. The Gateway should be the same as the IP address you used, but .1 instead of the last set of digits in your IP address. So, in my example above, 192.168.111.92 IP address should have 192.168.111.1 as the gateway.
- Now that you have set the Static IP address of your PTZOptics camera, you should be able to pull up the IP interface by typing the IP address into a browser. You will be prompted for a Username and Password, both are “admin” by default.
Now that your camera is on the network you can access it via any web browser by typing the IP address into the search bar and pressing enter. Once you have logged in, the first thing you may want to consider is updating the default login credentials with a more secure password. Also, make sure to write down your camera’s IP address because you will need this address to control the camera with software solutions such as OBS, Wirecast, vMix, Livestream Studio, TriCasters, and more.
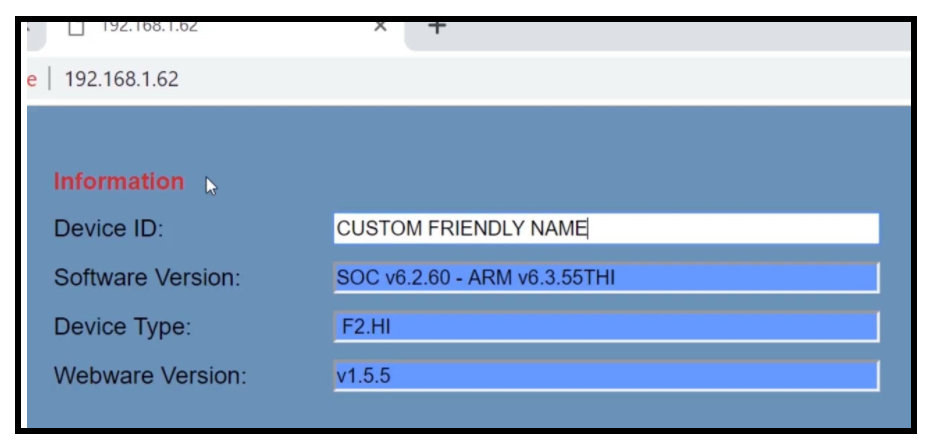
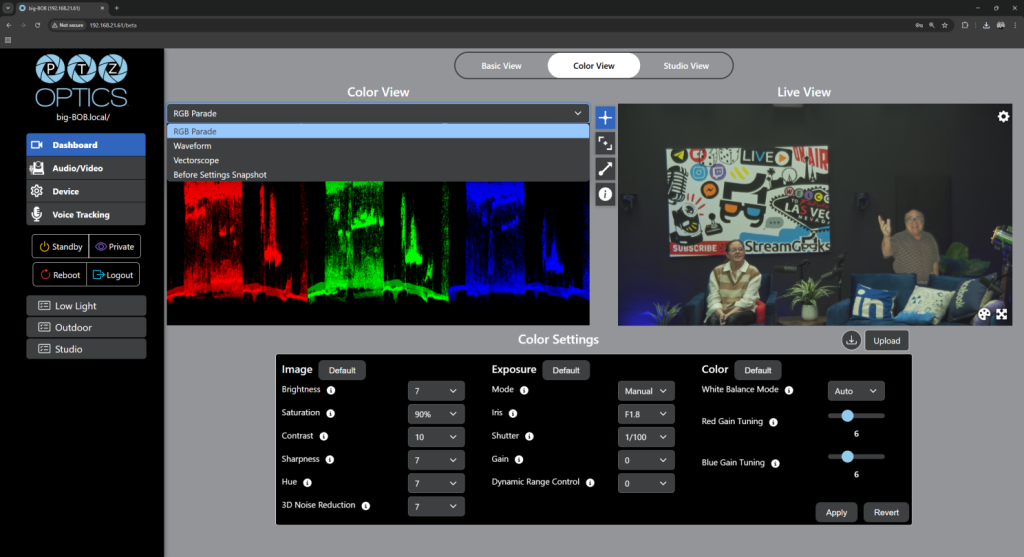
PTZ camera web interface shows a “friendly” name.
Pro Tip: Once you have logged into your camera via the web interface consider entering in a custom-friendly name. This friendly name is used by some software solutions to identify your camera. Also, this is a handy place to take note of the current version of the installed firmware. From time to time, you may want to reference the camera manufacturer’s latest firmware releases and decide if you should update the camera’s firmware.
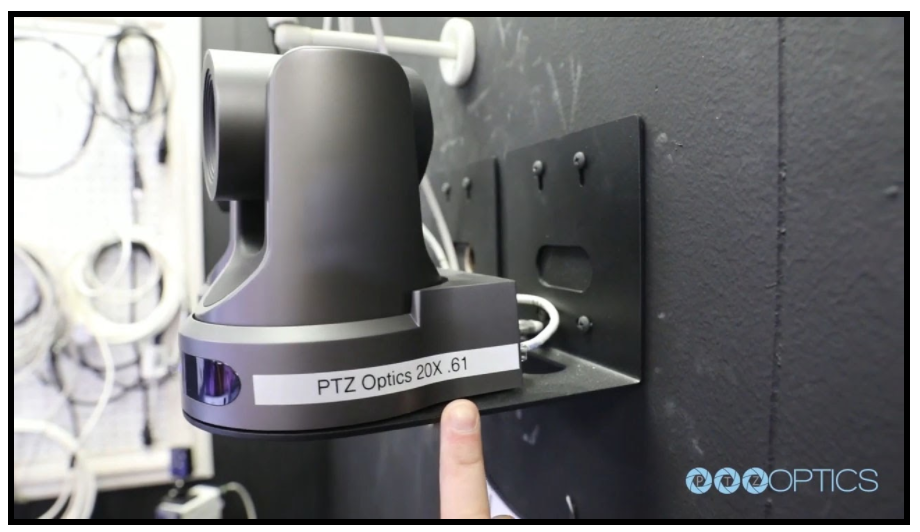
Camera with label and quick reference information.
Now that your cameras are digitally organized, you can further organize each camera for your quick reference with a label maker. It’s very helpful to label cameras with a friendly name and the last portion of their static IP address. If you have an IP joystick you can now organize your IP Joystick with a label that features each camera input as well. A label on a joystick that features a quick reference helps the camera operator switch between the available cameras and is ideal for live video productions. By using sequential IP addresses, future camera software and hardware setups will be a breeze.
It’s worth noting that IT professionals spend many years learning how to set up, manage and operate IP networks. This chapter has only scratched the surface of what’s possible with IP networking as it applies to IP video and PTZ cameras. There are two videos available on YouTube that you may find useful. The first video outlines an affordable networking setup based on the TP-Link Archer. TP-Link networking equipment is incredibly affordable. The router used is less than $100 and the PoE (Power Over Ethernet) enabled network switch is not much more expensive either. The second video outlines the top-of-the-line NETGEAR switches that come optimized for NDI and DANTE video standards. The NETGEAR switches are ideal for professional installations and they simplify the configuration process as well. You can scan the QR code with a phone to quickly watch either video.
Key Takeaways:
- Networking has created many new and important opportunities for video production and PTZ camera operators.
- While networking can be complicated, some best practices will make operating network-connected equipment more practical and efficient.
- Once your PTZ cameras are set up to work on the network, they can be easily configured to work with many different workflows.
Learn more about PTZ Cameras
- See how PTZ cameras are transforming video production here
- Learn high level, what a PTZ camera really is here
- Learn about every essential part of a PTZ camera here
- Learn about who is using PTZ cameras here
- Learn about the different types of PTZ cameras here
- Learn how to use an IR remote control with your PTZ cameras here
- Learn about the various PTZ camera control options here
- Learn how to mount a PTZ camera here
- Learn how to set the exposure of your PTZ camera here
- Learn about PTZ camera operation best practices here
- Learn about all the latest PTZ camera features here
- Learn how to automate PTZ camera controls here
- Learn more about Networking PTZ cameras here
- Learn about the new ePTZ camera technology here
- Learn about how innovations in video production are changing the industry here
- Learn how to use PTZ cameras for remote production here
Download the PTZ Camera Operator Handbook
Continue reading