How to use NDI with vMix
Written by Paul Richards on November 11, 2020
Working with NDI Sources in vMix
NDI or Network Device Interface is a powerful way to share video content across a local area network. The protocol, developed by NewTek, opens new production possibilities, and with vMix, it is easy to both send and receive video via NDI. Not only can vMix share cameras, video, audio, and graphics to other vMix devices, it can both send and receive from any devices or software that support the NDI protocol.
NDI stands for Network Device Interface and it is a high quality, video-over-IP standard developed by NewTek to enable video-compatible products to communicate, deliver, and receive high-definition video over a computer network ideal for live video production.

NDI Sources
What is NDI used for?
Many video projects use NDI to send and receive video over IP. NDI features an auto-discovery feature which makes managing video sources available on a network very easy. For example, a church may use NDI to send PowerPoint slides from one computer and receive them on another computer used for live streaming. Another example would be setting up a display in an office to show an NDI source coming from a video production software like OBS. Any Windows or Mac computer can receive the NDI video stream and display it on a TV located in a facility using free tools such as the NDI Studio Monitor.
Adding the Source
First, be sure that your vMix computer and your NDI source are connected to the same network. Adding an NDI source in vMix is just as simple as adding any other source. Just go to Add Input and select NDI/Desktop Capture. You will see all of the computers and devices on your network that are connected via NDI. Under each computer or device, you will see any available NDI sources. At the bottom, you will see a few checkboxes. One will select only the audio from the source. The other will receive the source in low bandwidth mode. Just click on a source to add it as an input. Once you have the input setup, you can change it to another NDI source by just right clicking on the input and selecting a new source.
Using the NDI Source
Once the source is ready, you can use it just as you would any other video input. You can toggle the audio on and off, preview it, or send it to an overlay channel. By clicking on the gear icon, you can access the full settings menu. When you open the settings, you will see that the NDI source settings are very similar to the settings on a directly connected camera and can be adjusted the same way. You can change the name for easier reference, set the mouse click behavior, mirror it, sharpen it, and enable or disable the automatic audio mix. You also have access to color correction and the ability to set up a chroma key if the source is set up with a green screen. You can make position adjustments, add it to a multiview, and even set up triggers and tally lights.
Pro Tip: Unlike normal inputs, you can right-click inputs to open up additional options.
NDI Settings Options
Bandwidth Matters
One important thing to consider with NDI is network bandwidth. While NDI sources are local and do not require internet bandwidth, they still need sufficient internal network bandwidth. For the best results, be sure you are using a gigabit network.
Note: NDI stands for “Network Device Interface” and NDI® HX is the “High Efficiency” lower bandwidth version of NDI. NDI HB stands for the “High Bandwidth” version of NDI. NDI features a combination of high-quality video with low latency transmission that is ideal for live video production. NDI|HX is ideal for broadcast professionals adding NDI sources to an existing network that has not been originally designed for video production. NDI|HX video sources are generally one tenth of the bandwidth of full NDI sources. See the bandwidth comparison chart.
| NDI Mode | Bandwidth |
| HDI HX Low (720p60fps) | 6-8 Mbps |
| NDI|HX Medium (1080p30fps) | 8-12 Mbps |
| NDI|HX High (1080p60fps) | 12-20 Mbps |
| NDI|HB (1080p60fps) | 125-200 Mbps (Nominal Range) |
Example:
| NDI Device Examples (1080p60fps) | Bandwidth | Accumulated Bandwidth | Total % of Gigabit Network Switch |
| NDI Scan Converter on Laptop for Powerpoint slides | 125 Mbps | 125 Mbps | 12.5% |
| 2 x NDI Monitor for camera operators | 125 Mbps / Each | 375 Mbps | 12.5% / Each |
| vMix System output in 1080p60fps | 125 Mbps | 500 Mbps | 12.5% |
| NDI Monitor in Overflow Room | 125 Mbps | 625 Mbps | 12.5% |
| 5 x PTZOptics NDI|HX (High) | 12 Mbps / Each | 685 Mbps | 1.2% / Each |
| Suggested Headroom | 250 Mbps | 910 Mbps | 25% |
| Total Usage | 91% |
Tip: Network Bandwidth head room recommendations can vary widely from 30% – 60% depending on what the network is utilized for. Please consult your network administrator before adding NDI sources to your local area network. Newtek suggests “NDI traffic should not take up more than 75% of the bandwidth of any network link.”.
Sending NDI from vMix
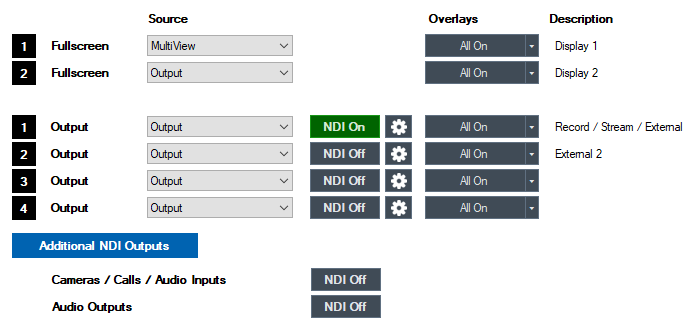
Keep in mind that it is also simple to send NDI across your network from inside vMix. Just go to your Settings menu and select Output. You can then easily assign any of your output to send an NDI signal from your Output, Preview, MultiView, or any input source.
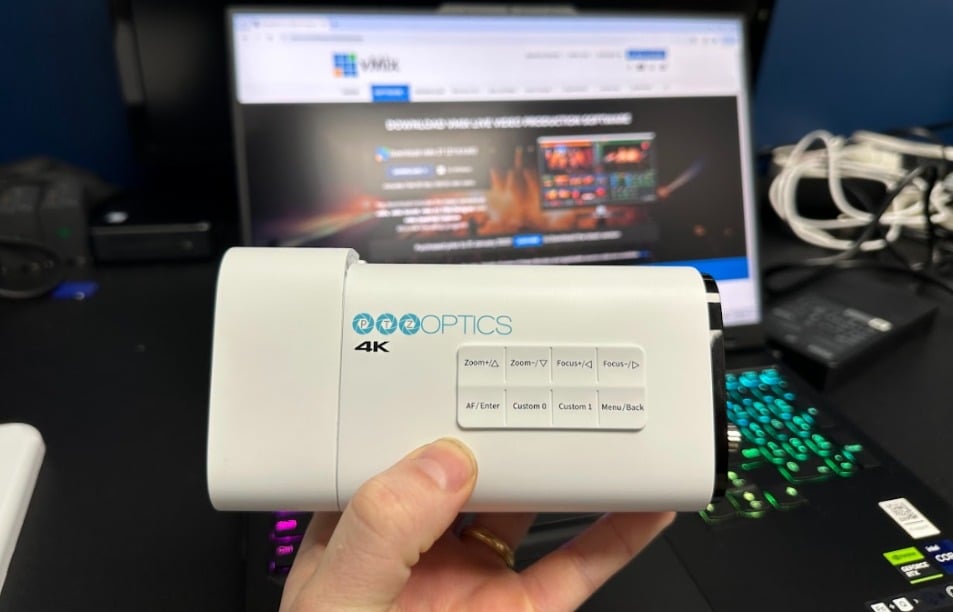
What is an NDI Camera?
NDI cameras are able to communicate using the Network Device Interface or NDI protocol. They can connect to a LAN (Local Area Network) and seamlessly integrate with hundreds of software applications including OBS, Wirecast, vMix, xSplit, NDI Studio Monitor and much more.
What is an NDI camera used for?
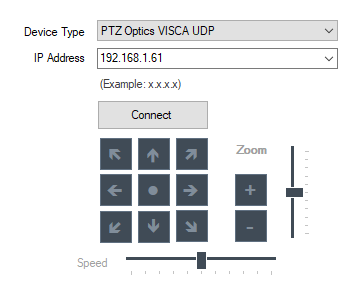
NDI cameras often have PTZ (Pan, Tilt and Zoom) functionality which takes advantage of the two-way communication capabilities of NDI. In this way, NDI cameras can be controlled over the same single ethernet cable used to send audio and video. For example, a PTZOptics NDI camera can use a single ethernet cable to power the camera, control the PTZ functionality of the camera, and to send audio and video to a source on the network. PTZ camera controls inside of vMix will be reviewed in an upcoming chapter.
What is the difference between NDI and SDI?
SDI is a technology that has been around for decades. SDI stands for Serial Digital Interface, and the cable itself is capable of sending uncompressed video long distances. NDI is a much newer technology that uses the latest video compression methods to make sending and receiving high-quality video possible over standard computer networks. An SDI camera video feed can be converted into an NDI stream and sent over the network. An NDI video feed can also be converted into an SDI video output and plugged into a monitor.
How do I set up an NDI camera?
Most NDI cameras are plug and play when it comes to setup. NDI cameras can be plugged into any LAN (Local Area Network) and configured to operate with any software or hardware solution that supports NDI. Once an NDI camera is plugged into the network, it will show up as an available source on your network; therefore, the friendly NDI name that you give your camera will show up in any software or hardware solution when you click the “add NDI source” option.
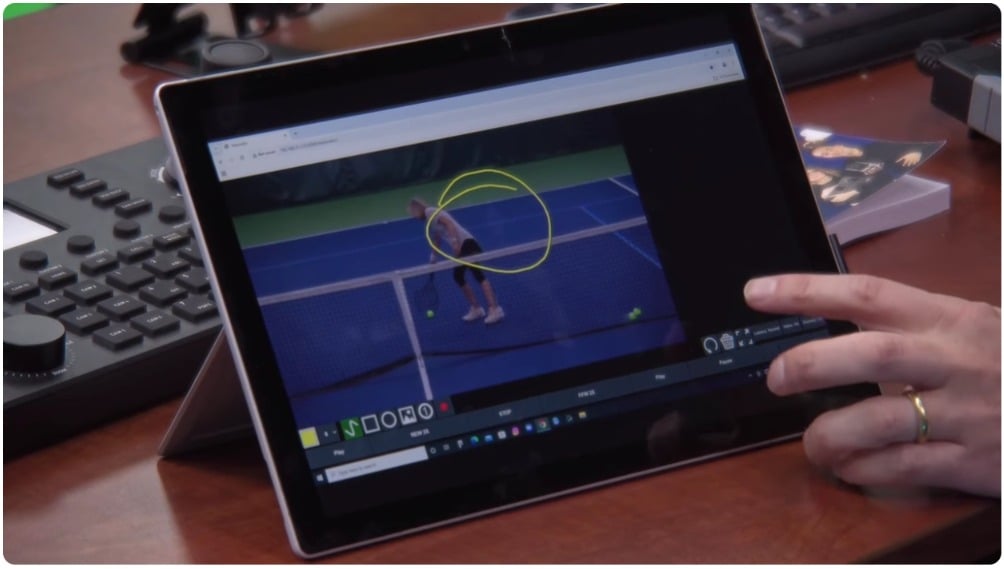
vMix Desktop Capture
How can I capture video from another computer?
Perhaps one of the most popular ways to get started with NDI is sending video from one computer to another. Popular examples of this include sending PowerPoint slides from one computer on your local area network to the main vMix video production software. vMix has a handy tool called vMix Desktop Capture that you can download for free to enable a secondary Windows computers to send video via NDI back to your main vMix computer.
Desktop Capture Settings
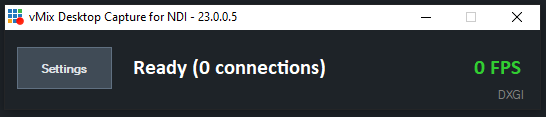
vMix Desktop Capture for NDI is incredibly easy to use. Once you open it up, it will search your computer for potential screens and applications to capture and it makes them available on your local area network via NDI. Back at your main vMix computer, you will instantly see all of the available screens and windows available to connect with via NDI using the vMix Desktop Capture for NDI tool.
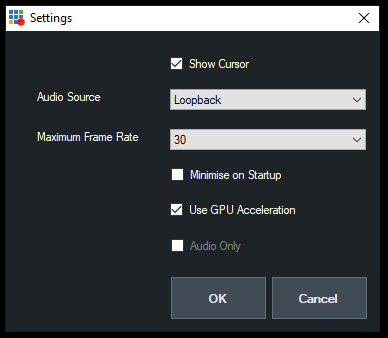
There are just a few options that are revealed when you click the Settings button. vMix Desktop Capture for NDI allows you to show or hide the mouse cursor. You have the option to send loopback audio, choose silence or a specific audio interface. You can also minimize this application at startup and enable GPU acceleration. It is easy to use!
Start Learning vMix
- What is vMix. Learn here
- Getting Started with the vMix interface here
- Learn how to work with vMix inputs here
- Mixing Inputs Together with vMix Multiview here
- Learn about vMix titles here
- Learn how to mix Audio in vMix
- Learn how to use VST3 audio plugins with vMix here
- Learn all about vMix settings here
- Learn about how to use vMix Full Screen and Multiview here
- Learn how to record video with vMix here
- Learn how to live stream with vMix here
- Learn how to use vMix video overlay channels here
- Learn how to make Stinger Transitions in vMix here
- Learn how to use social media comments in your live stream with vMix Social here
- Learn how to use vMix shortcuts here
- Learn how to use GT Title Editor to make custom vMix titles here
- How to use vMix Call to bring guests in your live stream here
- How to control vMix remotely with the web controller here
- How to use vMix color correction tools here
- How to use virtual sets with vMix here
- How to use NDI with vMix here
- How to control PTZ cameras in vMix here
- Learn how to connect vMix with Zoom using the virtual webcam output here
- Learn how to use automated playlists with vMix here
- Learn how to use data sources with vMix here
- Learn how to use vMix triggers here

Continue reading