Getting Started with vMix
Written by Paul Richards on October 26, 2020
Part of what makes vMix great is that it is available in six editions to fit your exact needs and budget. If you are not sure what works best for you, you can try the full edition for free for 60 days. That way, you can see what features and options you need before you decide.
The six editions differ in the features that they unlock. With the free edition, you get a fully functional program with four inputs, two camera inputs, and a maximum resolution of 768 x 576 (SD). It also includes the ability to send three simultaneous live streams and record. You can take advantage of one video overlay channel and access built-in animated titles, scoreboards, and tickers.
The Basic HD edition adds an additional camera input and bumps resolution up 1080p. The next level (HD) virtually eliminates input limits with a total of 1000 inputs for cameras or any other source. It also adds vMix Call for one caller, which is great for bringing in remote guests to your production. It also offers a total of four overlay channels. The final two editions, 4K and Pro, increase the top resolution to 4K plus add more advanced features like dual recording, instant replay, and PTZ camera control.
Installing vMix
Whether you have already purchased a vMix license or want to try the free 60-day trial with full functionality, the process is the same:
Go to vMix.com
- Click on the download button near the top of the screen.
- Click the button to begin the download.
- Run the installer.
- Follow the installation prompts.
- Enter your email to begin the free trial or enter your vMix registration key that you received after a purchase.
Once the software is installed and running, it will prompt you to select a preset. Do not worry if you aren’t sure about this. You can change it later. vMix presets are used to save layouts of inputs. These presets can be saved and loaded as an easy way to switch and recall projects you have worked on in the past. You will want to pick the option that matches the resolution and frame rate of your cameras or other video sources. If you have installed the software on an older, lower-power computer, you may need to choose a lower resolution and frame rate to ensure smooth operation.
Updating vMix
One of the great things about vMix as a company, is their support for new features. The creators of vMix pay close attention to their community of users who actively post new ideas in the user forums. If there is enough support for a new feature idea, it is usually implemented in the software within a period of time. As new updates become available, you will see a little message at the bottom of vMix that says, “Update Available.”
Each purchase of vMix includes 12 months (1 year) worth of free updates. After one year, you will need to purchase additional updates. You can check to see if you are eligible for free updates and purchase additional updates by logging into your vMix account at https://account.vmix.com/.
Finding Help
Once you are up and running, be sure to go back to vMix.com to get all the information and support you may need to get started. Clicking on the “support” button on the home page will give you access to the user guide and training videos. You can also search the knowledge base for answers to frequently asked questions and known issues, join the forums to share knowledge with other users, and even reach out to support if you can’t find the information you need.
Now with the software installed and access to all the help you may need, it is time to dig in and get started with vMix.
The Interface
vMix is packed with features and options. Fortunately, you do not need to master all of them to get started. It is best to first familiarize yourself with the overall layout and functionality of the interface.
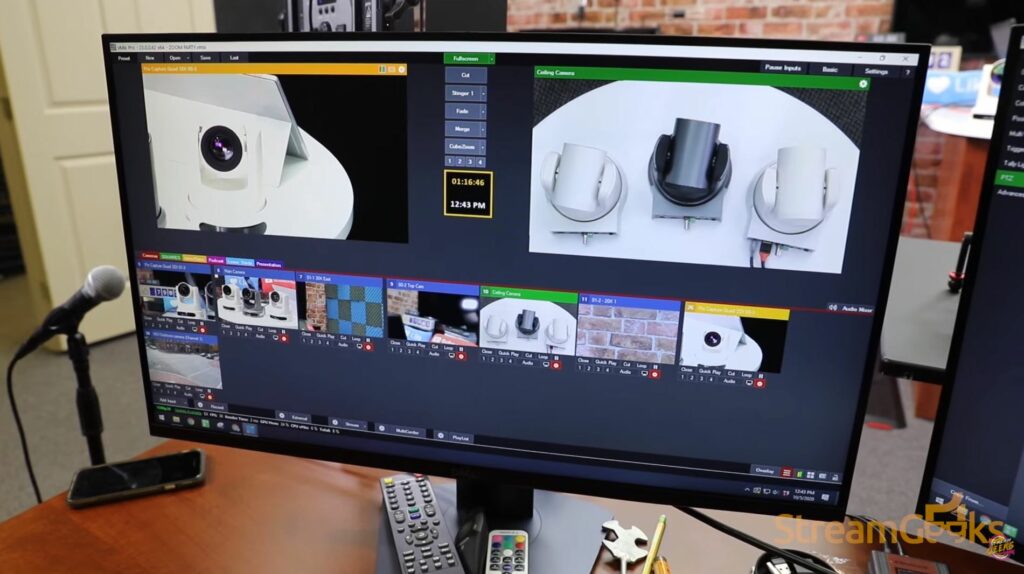
The Preview and Output Windows
When you open vMix for the first time, you will see a blank canvas. This will come to life as you begin to add pieces to your production. Taking up much of the screen, you will see two windows. The on the right is the “output” window, and the one on the left is the “preview” window. The output window shows what is currently being sent to your live stream or recording. This is often referred to as the program monitor. Whatever is in the output window is “live” meaning its being recorded or live streamed depending on the enabled features. The preview window lets you view an input source before sending it to the output with a transition button. Using the preview window, you can be sure that you have the right source, and everything looks good before switching it to the output.

vmix interface
The Input Area
On the bottom left of vMix, is one of the most important parts of the interface, the input area. This is where you set up everything you want to add to your production, including cameras, videos, images, and websites. Anything that you eventually want to end up on the output screen needs to start here.
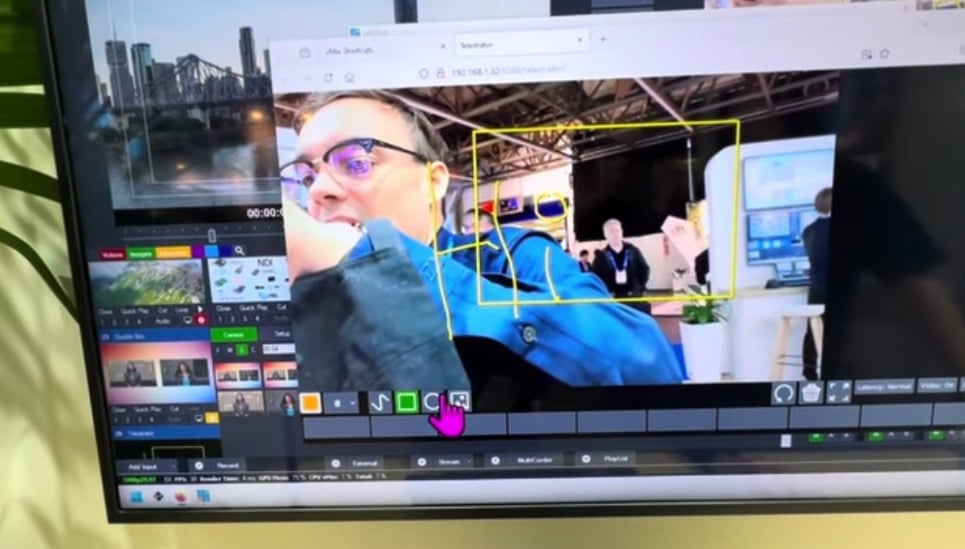
The Transition Bar
In the center of the screen, between the preview and output windows, is the transition bar. This is where you can switch from what is in the preview window to the output. There are multiple options for this, including an instant cut. Next to each of the other additional options is a dropdown menu where you can choose from several additional preset transitions. There is also a manual fader bar at the bottom that allows you to manually control the transition speed.

using the vmix interface
Other Features
Other features of vMix will be covered in future chapters but you should take some time to explore the interface. Check out the Settings menu in the upper right to adjust some of the more advanced settings. Also, look at the control button option across the bottom bar next to Add Input. Record enables recording of the output. Click on the gear icon to choose the filetype, location, and other recording settings.
The External output feature allows you to send audio and video out of vMix in several ways. Click on the gear to see how you can select what sources are assigned to what outputs. Click the gear next to the stream to set up your live stream to multiple destinations.
On the far right are several menus, including one for overlay settings, statistics, shortcuts, and a hamburger menu that will reveal several other submenus.
There is no need to master all of these menus and settings yet. This chapter is to help you understand how the interface is laid out and how to find things as you need them later. Very few operators will ever use every possible setting or feature of vMix, but it is good to know where they are.
Start Learning vMix
- What is vMix. Learn here
- Getting Started with the vMix interface here
- Learn how to work with vMix inputs here
- Mixing Inputs Together with vMix Multiview here
- Learn about vMix titles here
- Learn how to mix Audio in vMix
- Learn how to use VST3 audio plugins with vMix here
- Learn all about vMix settings here
- Learn about how to use vMix Full Screen and Multiview here
- Learn how to record video with vMix here
- Learn how to live stream with vMix here
- Learn how to use vMix video overlay channels here
- Learn how to make Stinger Transitions in vMix here
- Learn how to use social media comments in your live stream with vMix Social here
- Learn how to use vMix shortcuts here
- Learn how to use GT Title Editor to make custom vMix titles here
- How to use vMix Call to bring guests in your live stream here
- How to control vMix remotely with the web controller here
- How to use vMix color correction tools here
- How to use virtual sets with vMix here
- How to use NDI with vMix here
- How to control PTZ cameras in vMix here
- Learn how to connect vMix with Zoom using the virtual webcam output here
- Learn how to use automated playlists with vMix here
- Learn how to use data sources with vMix here
- Learn how to use vMix triggers here

Continue reading