VST Audio Plugins for OBS
Written by Paul Richards on February 24, 2022
VST 2 plugins can be used with OBS to enhance the audio quality of your inputs. It’s recommended to use one of the free VST2 plugins for OBS from Reaper.fm for optimum performance. The ReaGate plugin can be installed on any Windows computer and added to OBS using the VST 2 plugin filter option.
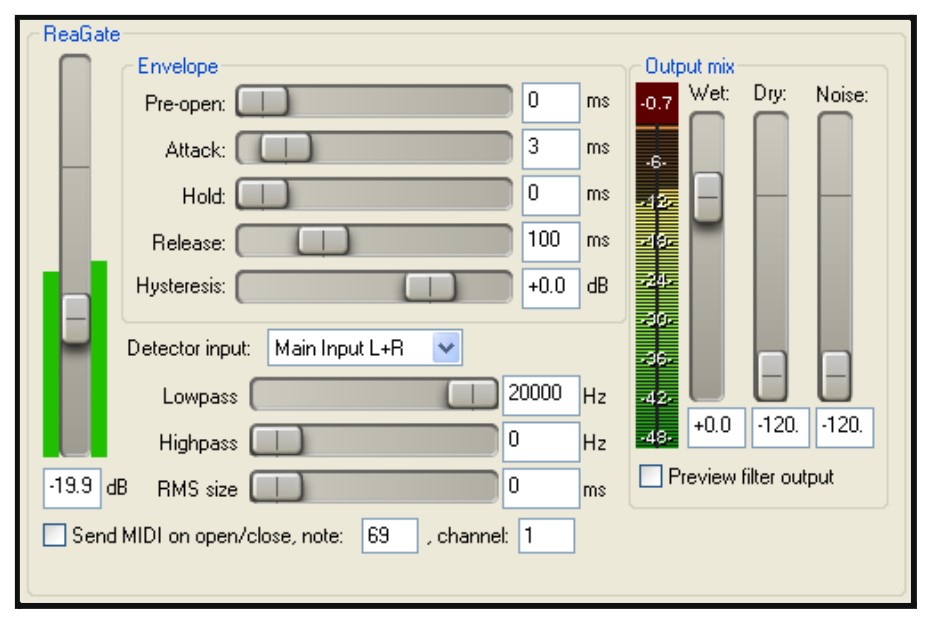
ReaGate is a free VST 2 plugin available for use with OBS
There are a few tricks you can apply to a Noise Gate to make it sound more natural. If you have a deep voice you can use a High Pass Filter around 80 Hz to make the audio gate sound more natural. If you are using the default OBS Noise Gate there is no option for using a high pass filter. If you find the noise gate makes your voice sound unnatural you will want to adjust the Attack and Release settings to tune how quickly the filter affects your voice. It’s a good idea to record a few tests as you adjust the noise gate. Try listening with your headphones and focus on the beginning and ending of words to make sure the gate is not turning on or off too quickly.
Next, you can work on an EQ. An EQ can make a voice or other audio source easier to hear and understandable for listeners. Unfortunately, there is no default EQ for OBS and you will need to use a VST 2 plugin to gain this functionality. Using an EQ takes some getting used to but you can apply some best practices to get started. If you are creating an EQ for the human voice, you can use basic high-pass and low-pass filters to remove unwanted noise and enhance the vocals. Male voices and female voices differ in the frequencies they generally exhibit. Male voices range from 80 to 500 Hz. Female voices range from 175 to 1180 Hz. Most EQ interfaces will show a graphical display that starts at 20 Hz and goes up to 20 kHz. Since the human voice generally starts at 80 Hz, there is no reason to include audio from frequencies below this area. Between 80 and 120 Hz is the lower bass sound of the voice and it is very important for intelligibility. In between 200 and 300 Hz is the boom of a voice which gives it its fullness. Between 300 – 1000 Hz you will hear the reflections of the room. Finally, between two and three kHz you can usually add clarity to your voice. Regular telephone calls generally max out at 3 kHz. Between five and 15 kHz is what is called sibilance which provides minimal nuances in the human voice. Anything above 15 kHz is not needed for most audio capture systems. In fact, you can trim out some unwanted high-pitched sounds by removing these higher frequency EQ bands.
A VST EQ for OBS
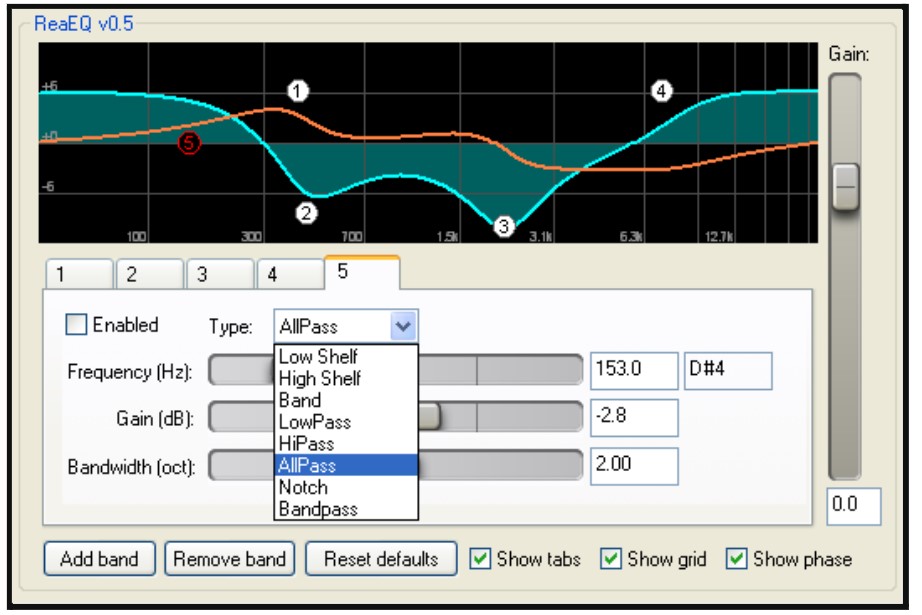
A VST EQ for OBS
The final stage for most audio chains is the Compressor. OBS does offer a built-in compressor you can use with any audio source. The compressor will help “level out” your audio throughout an entire period of time when you may speak louder or softer at various times. The main compressor adjustment you want to start with is the Ratio. The Ratio adjusts the entire compression that is added to your audio. Adjusting the Ratio is easy to listen for, because the effect makes your voice sound more and more like a radio host. Once you have the ratio you like, you will need to set the Threshold. The Threshold is the level at which your compression ratio will start to kick in. To set the Threshold speak loudly and determine where you would like the compressor to limit your audio from peaking at the top end of your loudest moments.
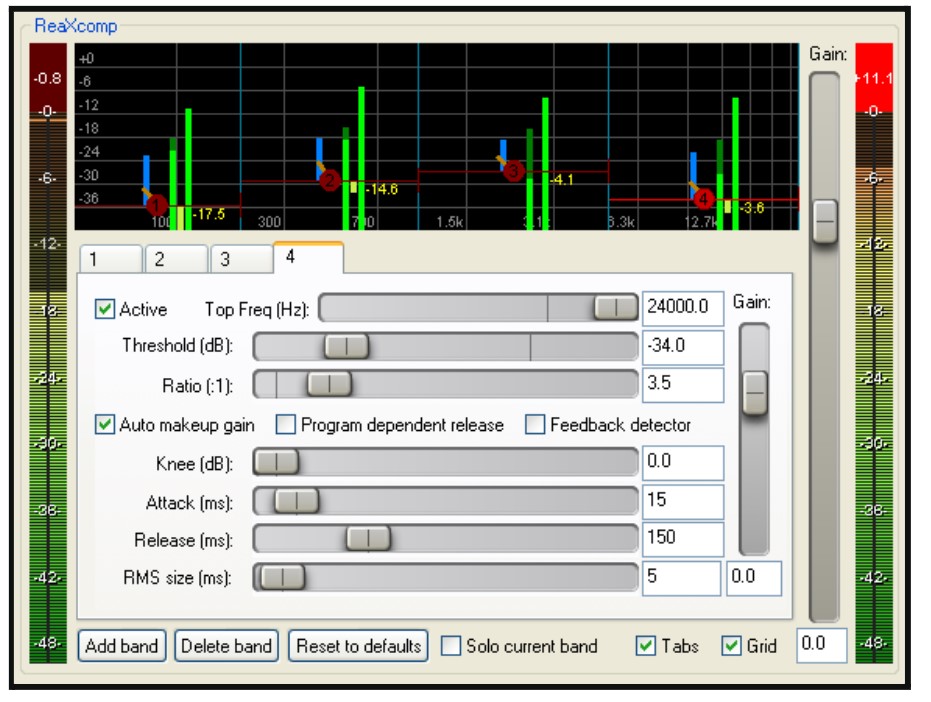
ReaXcomp is a free VST plugin from Reaper.fm
The default OBS Compressor offers a very interesting feature called Sidechain/Ducking. Once you have configured a professional audio chain, you may want to apply the Sidechain/Ducking feature to other audio sources you have in your audio mix. Sidechain/Ducking will take the audio levels from your microphone and automatically lower the audio from other sources when it is active. This is a great way to automatically mix together your audio sources when you want the audience to be able to better hear your voice over other audio sources playing the background.
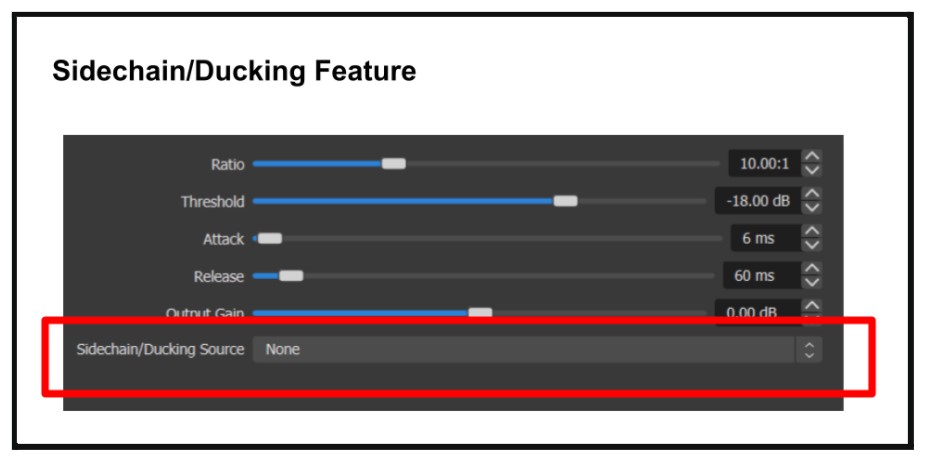
The Sidechain/Ducking feature is found in the Compressor filter settings.
You can apply a Sidechain to any audio source with the Compressor filter. The Sidechain/Ducking dropdown menu is the last option in the default OBS Compressor filter. This is where you can select the audio source you would like OBS to use to effectively reduce the audio with. When you create this filter, name it specifically for “Sidechain/Ducking” so that you can remember the purpose of this filter is different from a normal compressor because it takes its direction from the selected Sidechain audio source. When you create this filter, you will be able to adjust how much the audio “Ducks” when your selected microphone is active. Therefore, you can set the Threshold, Attack, and Release just like a regular compressor.
Key Takeaways:
- Audio is always one of the most important portions of a video production.
- OBS offers default audio filters that can be used to enhance your audio production
- OBS also supports VST plugins which provide additional enhanced audio adjustment capabilities with higher quality graphical interfaces.
Additional chapters from the OBS Superuser Guidebook
- Chapter 1 - An Update on the Updates here
- Chapter 2 - How to Customize OBS here
- Chapter 3 - How to Optimize OBS here
- Chapter 4 - How to use the core features of OBS here
- Chapter 5 - How to use video filters in OBS here
- Chapter 6 - How to use audio filters in OBS here
- Chapter 7 - The Top 10 OBS Plugins here
- Chapter 8 - The Multiple RTMP Streaming Plugin here
- Chapter 9 - The Automatic Scene Switching Plugin here
- Chapter 10 - How to record multiple sources in OBS here
- Chapter 11 - How to dock sources with live video in OBS here
- Chapter 13 - How to use NDI in OBS here
- Chapter 14 - How to route Audio in and out of OBS here
- Chapter 15 - How to use Virtual Audio cables with OBS here
- Chapter 16 - How to use VST Audio Plugins for OBS here
- Bonus Chapter - How to fix audio sync issues in OBS here
- Chapter 16 - How to use use hotkeys with filters here
Check out our other articles about Open Broadcaster Software below:
- Updated - How to connect OBS and Zoom with VoiceMeeter and Headphone Monitoring - here.
- Learn how to use OBS for remote production here.
- How to connect OBS with Zoom, here
- OBS vs vMix a complete review here.
- How to use Zoom for Church Meetings and Worship here.
- Here are the top 10 OBS features you need to know about
- Getting dropped frames in OBS. Here are some new feature to help with that.
- Take a look at OBS 24 and all the new feature here.
- Increase your productivity with OBS and learn how to use hotkeys here
- Learn how to setup animated stinger transitions in OBS here
- Learn how to install the NDI plugin for OBS (and why you should) here
- Learn more about the latest OBS user interface (UPDATED for 2019) here
- Make your audio in OBS sound great with these VST 2 plugins here
- Learn how to fix the most common OBS issues! Audio and Video Sync! here
- Learn how to use OBS 20+ here
- Learn how to use NDI Cameras with OBS here
- Learn how to use the OBS Multiview here
- Learn OBS quickly with our ZERO to SIXTY tutorial video here
- Learn more about OBS settings and optimizing your settings for live streaming here
- Learn how to record videos using OBS here
- New OBS 24 feature allows broadcasters the ability to pause and restart video recordings. Learn more here.
- Learn how to add live annotations over your OBS productions here
- Learn how to add a webcam and set up a picture in picture scene inside OBS here
- Learn how to crop and rotate inputs inside OBS here
- Learn how to use color correction tools and LUTs here
- Learn the best way to connect OBS and Zoom here
- Learn how to connect OBS and Teams here
- Learn how to use countdown timers in Teams here
- Learn where OBS recordings are saved here
- Learn how to live stream to YouTube and Facebook with OBS for free here
- Learn about OBS 27's new features here

Continue reading

